You'll see the embossed crackle panel forms the main focal layer on this card, providing lots of texture in soft muted colours that allow the flowers to pop in the foreground. Let's see how that effect was achieved.
3D Embossed Crackle Effect Tutorial
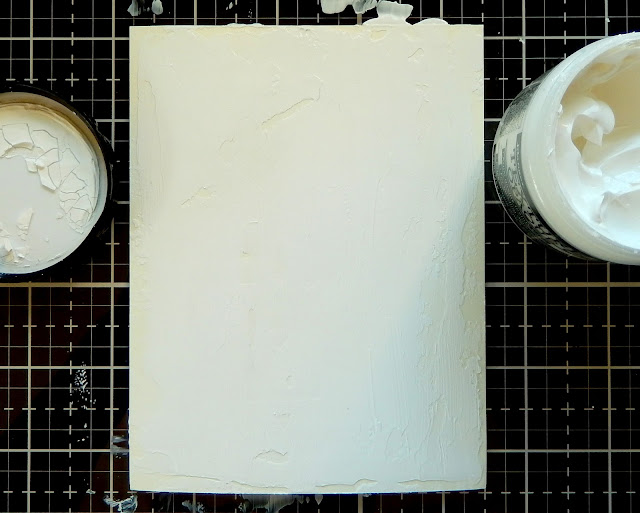
Begin with a piece of Tim Holtz Mixed Media Heavystock and cover it in a layer of Opaque Crackle Texture Paste. I love this paste as it remains flexible when dry and doesn't rip up your ink blending sponges when applying colour over the top.
When dry add a thin layer of Matte Distress Collage Medium; you want to provide a coat that you can work over whilst allowing the cracks to remain in place and visible.
The reason for applying that coat of Distress Collage Medium is that it makes blending Distress Crayon colour much easier to do. For this project I rubbed the Tattered Rose Distress Crayon over the surface and worked it into all the cracks and dips with my finger. If you apply too much colour the Collage Medium also allows for the removal of that excess with a wet cloth.
Once coloured, emboss the crackle covered card with the 'Botanical' 3D Texture Fades Embossing Folder. You'll see from the photo below that the crackle surface remains perfectly intact, a testament to the flexibility of the Opaque Crackle Texture Paste, particularly when combined with the Distress Collage Medium. Finally to add more depth of colour rub the Tattered Rose Distress Oxide Ink pad over the embossed surface. It remains 'wet' for a while so you could even heat emboss it with clear embossing powder at this point.
When it came to completing the card you'll see from the photo below that I ripped the embossed piece in half and blended Walnut Stain Distress Ink onto it. This was layered onto a paint altered piece of Tim Holtz 'Wallflower' Paper Stash with Design Tape and stitching.
I also added a floral image from Tim's Ideaology Layers, Botanical pack and in the past may have been tempted to leave it at that. However, this time it occurred to me that the flowers looked like some of those in the Funky Floral sets. Sure enough, those die cuts once painted with Distress Paint gave the image a totally different dimension and provided the perfect accompaniment to the Quote Token.
The Close Ups
Let's take a closer look at the details of the completed card to finish. You'll notice I created a border by adding Design Tape to a slightly larger piece of card layered underneath the painted background, a clever idea I picked up from the amazing Zoe Hillman;
That's it for today's project. I hope you give this technique a go and look forward to seeing the results. In the meantime I've added a list of ingredients for my card below.
Have a great weekend and get creative!
Jenny xxx


ABSOLUTELY spectacular Jenny. The flowers looks AMAZING.
ReplyDeleteThis is just magnificent! You are my layering idol!! I have to get over my fear of covering things with other things. You totally inspire me. Absolutely amazing....
ReplyDeleteJenny, you could tip me over with a feather! Wow! Just STUNNING play with the Embossing folder and adding those flowers is an incredible final touch! BEAUTIFUL! (Save this one for me :)) Hugs!
ReplyDeletePS I really love your photo shoot background!
ReplyDeleteThis is absolutely amazing. The layering that you did for this card is absolutely beautiful. I love the intricate details and colors that you chose. Thanks for the share, loved seeing this card.
ReplyDeleteWorld of Animals
Such a stunning card Jenny and I just love the details and those stunning flowers x A real beauty xx
ReplyDeleteTFS and hugs
Annie x
This is so beautiful! I love all the texture from that embossing and crackle paste.
ReplyDeleteKate
So cool! And thanks for the step by step. I love the 3D and crackle technique and plan to use that one soon!
ReplyDelete~Heather