Hi everyone and welcome. During the second half of December Eileen Hull has been hosting an event in the Eileen Hull Fan Club called 'Comfort & Joy' where she and a number team members have been posting special festive projects in the lead up to Christmas. Make sure you are a member to catch up on all the fun!
Since my project is coming to you on Christmas Eve I have put together something that you can make during that time between Christmas and New Year when it may be possible to carve out a little creative time for yourselves. And for all of those who have signed up to an online art course starting in January 2022 this might just come in handy!
I've put together a step by step tutorial for creating, binding and filling one of Eileen's Full Size Journal's, decorated in festive colours and with a design that makes it useable beyond the holiday season. It's full of detail so grab a coffee...
The Cover
So let's start by cutting two covers using the Sizzix Scoreboards 'Full Size Journal' Plus Die from something which is sure to be lying around at the moment - cardboard packaging. Don't worry if you've had to tear off address labels and tape because you will be covering both sides.
Cut off the spine pieces using a sharp blade - you will only need one of the spine pieces so the other can be discarded at this stage.
With the covers of the journal needing decorating you have many options - for example grab some of that decorative paper you've been 'collating', use a gel plate to create some of your own as I have here or even pull gel plate prints directly on to your covers!
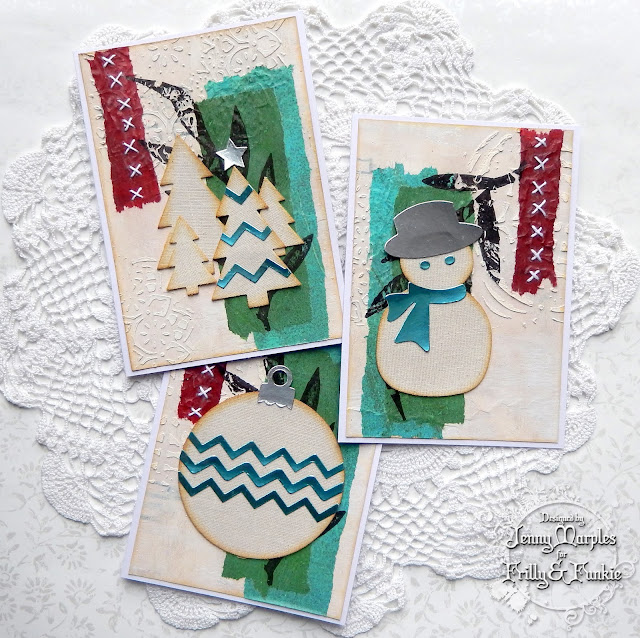
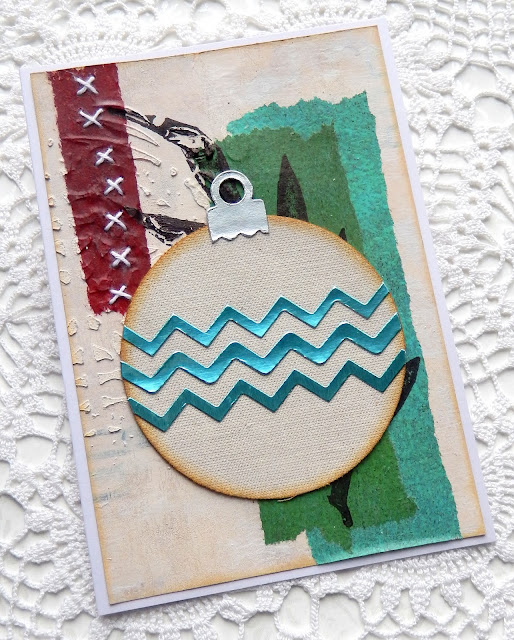
I kept my 'pulls' relatively simple by adding a layer of paint onto the plate each time (red/brown, green/brown, turquoise/green) and removing the 'leftovers' onto what I thought would be a 'scrap' piece. Turns out the various partial layers of red, green and turquoise turned out to be my favourite! I used wet strength tissue (similar to deli paper) on a 12 x 12 plate - copier paper will work equally well and as long as your pulls are about 6 x 9 inches they will fit the covers perfectly.
My friend and team mate Elizabeth Robinson kindly gifted me some Scotch glue sticks and they work really well as a no fuss way of attaching the printed tissue to the covers. Notice I put the scrappy edge of the pull on the spine side of each cover where it will soon be covered up. I also used sandpaper to neaten and 'distress' the edges.
To re-attach the covers to the spine and make it more flexible/sturdy I used 40mm wide 'Architape' and 3/8" hinge spacers from CoolKatzCraft, adding strips of the tape from the centre along the length of the spine onto each cover leaving a gap between them. Kay and Maggie have a fantastic video tutorial demonstrating this HERE.
To decorate the inside of the now assembled journal cover I added a piece of calico fabric (torn to fit) over the whole surface using the glue stick again. Adding fabric strengthens your covers and spine, though you could just opt to paint the inside or cover it with more paper if you'd prefer - I would do that before adding the spine if you are taking that route.
You should still be able to feel through the tape where the die cut holes are in the spine at the top and bottom. Re-punch the holes and punch extra holes half way along the spine between the top and bottom ones.
To decorate the front of the covers I took inspiration from old Basic Grey collections, applying extra bits of coordinating gel print and adding lines with the edge of a ruler (black gesso and Versafine Clair ink work well). The stencilling was done using a Rebekah Meier stencil called 'Pointelle' with white gesso.
Another of Rebekah Meier's stencils 'Distressed Lace' was used in conjunction with pink paint to alter some of the red tissue. Again you could use coordinating pieces of patterned paper if you'd prefer.
You can see below how it has been cut into banner strips and glued to the cover. I also die cut some more tissue using Eileen's 'Heart Mandala' Die to add over the top.
As a final decorative touch the stars (from Eileen's 'Wreath & Snowflake' Die Set) and word were die cut from the Architape which helpfully has an adhesive backing.
Finish up by using a scrap of paper to mark out where the holes are in the spine, creating a template for the signatures inside.
The Pages
To create the signatures you will need a mix of papers no bigger than 12 x 8 1/4 inches (30 x 21cm) which will be folded in half. The easiest way is to use your standard size paper (8 1/2 x 11 in the US, A4 in the UK) folded in half but it's also good to include some which is slightly smaller. I chose a mix of watercolour paper and wallpaper for mine because I will be adding a mix of wet media and need something sturdy. You can also use book pages, vellum, fabric, manuscript paper, decorative paper, fabric and more - basically think about what you will be using your journal for and go with surfaces that you know will work.
Create three stacks of between three and seven sheets (allow for the fact that you may want to add media to your pages which will bulk them out) and secure them together using low-tack tape, paperclips, pegs etc. Use your template to mark and punch through holes at the top, middle and bottom of the stack, going through all the pages.
Using strong thread at least 2 1/2 times the length of your spine (I used some thin cotton wool) start by going through the top hole in the first signature from the inside to the outside then through the corresponding hole in the cover. Originally I picked one on the side but found it better to start with the centre top hole.
As you come out through the hole in the spine pass the thread through a small button then put the needle back through the same hole and back through the signature to the inside, in this way securing the first signature at the top of the spine.
Now take your thread down to the bottom of the signature, pulling the thread along the length of the signature, and push the needle through the hole in the bottom. Take it through the corresponding hole in the spine and out to the outside of the cover. Repeat the process of passing the thread through a button before pushing your needle back through the same holes to the inside of the signature at the bottom.
Take your needle and push it through the hole in the centre of the signature, carrying on through the spine to the outside. Once again thread through a button before re-inserting the needle through the same holes back to the centre of the signature.
Make sure the thread it pulled taught through all the holes before tying the ends together in the middle.
Looking from the outside you should have your first row of buttons attached at the centre top, middle and bottom of the spine. Repeat the process for the other two signatures, starting at the top hole, going down to the bottom hole and then back up to the middle hole before tying off in the centre each time.
You will end up with three signatures securely attached inside your journal cover all ready and waiting for you to get creative!
And on the outside you can see where the buttons are helping to hold those signatures in place. When choosing buttons I would recommend testing them first to make sure they are small enough to fit and thin enough that they don't add too much bulk to the spine - if you want your pages to lay flat inside when working on them this is important.
And so your Full Size Journal is ready for action!
I hope you've enjoyed this tutorial and find it useful for making your own Full Size Journals. Make sure to check out the other seasonal projects and tutorials that have been shared as part of the 'Comfort & Joy' event in the Eileen Hull Fan Club.
Wishing you all a very happy and healthy Christmas,
Jenny xxx
Jenny xxx


