29 March 2022

Topflight Stamps Birthday Blog Hop

Hi everyone and welcome. It's Topflight Stamps 5th birthday and to celebrate, I’ve been invited to team up with some great designers to showcase celebratory projects using the unique products available at Topflight Stamps. Please hop along with us and see all the beautiful talent from this group of amazing designers! You should have arrived here from Lisa Hoel's blog. If not, no worries, catch the details at the end of this post.


GIVEAWAY DETAILS

Of course, it wouldn’t be a birthday celebration without prizes! Topflight Stamps is giving one lucky winner a $50 Gift Certificate to the store. But wait, there is more; each stop on the hop has an additional $25 Gift Certificate up for grabs for some lucky commenter. For a chance to win, make sure to visit every stop on the hop and leave a comment by April 3rd. Winners will be announced on the Topflight Stamps blog on April 7th. Good Luck!

So now it's time to share my celebratory project and as luck would have it there are a couple of family weddings coming up so my choice of celebration theme was easy.


Going with a neutral colour scheme I pulled out a wallet full of leftovers.


After choosing some bits and pieces from the pile I stamped, painted and cut out flowers from PaperArtsy Scrapcosy stamp set ESC018.


I shaped each petal with a ball tool and added pearls to the centres of the flowers. The leaves from my scrap pile were stamped using PaperArtsy Courtney Franich stamp set ECF05.


A border was created for the background by heat embossing with white embossing powder onto tea stained card.using an image from PaperArtsy Scrapcosy stamp set ESC28.


Moving to the background Grunge Paste was scraped through PaperArtsy Sara Naumann stencil PS219.


A central panel was assembled using gauze covered card with lace and the heat embossed border. The flowers were then placed in a line from the top.


It's always good to add a sentiment to the front of a special card. Having found the perfect words in PaperArtsy Sara Naumann stamp set ESN37 I stamped them onto a scrap from a gel plate print. This was then added to the base of the card after the background and fabric panel had been added to a white card blank.


Here are a couple of close ups of the finished card to show the different elements in more detail;


That's it from me for this hop. I hope you've enjoyed seeing how my card came together.
Thanks for stopping by!
Jenny xxx

And don't forget, for a chance to win, make sure to visit every stop on the hop and leave a comment by April 3rd. Winners will be announced on the Topflight Stamps blog on April 7th. Good Luck!

15 March 2022

Fabric and Fibres with Eileen Hull Designs

Hi everyone and welcome. Throughout this month Eileen Hull's teams are featuring creations with fibres, fabric and felt components. The designers are using them for accents on projects as well as major parts in their constructions. In one of Eileen's most recent Lives she looked at ideas for filling all those journals we've had such fun making. Feeling inspired I've decided to show you some ideas for doing the same, incorporating fabric and fibres with Eileen's dies. 

(click on each photo for a closer look)

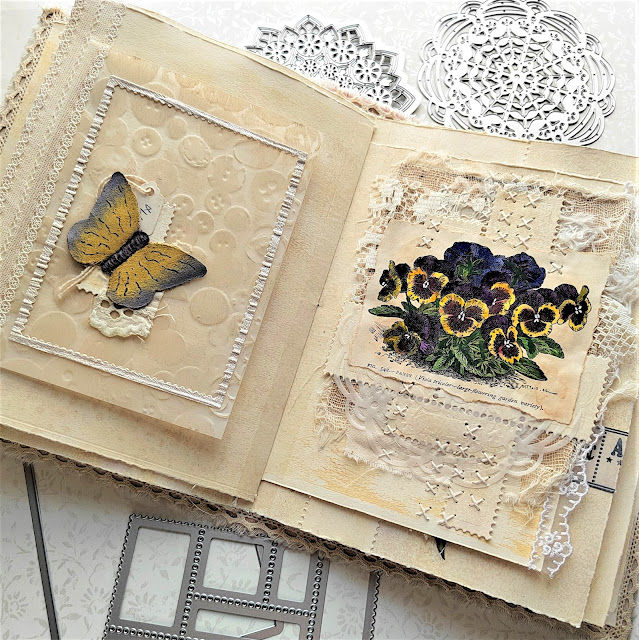
The page with the pansies on may look complicated but it's easy to achieve and begins with pieces of brown paper (old packaging material, a used paper bag, etc) and some torn scraps of muslin.


Start layering them with extra scraps of fabric and gluing it all in place; curtain samples, old net curtains, linens with holes in that would be destined for the trash - it will all work to add texture and pattern to your page.


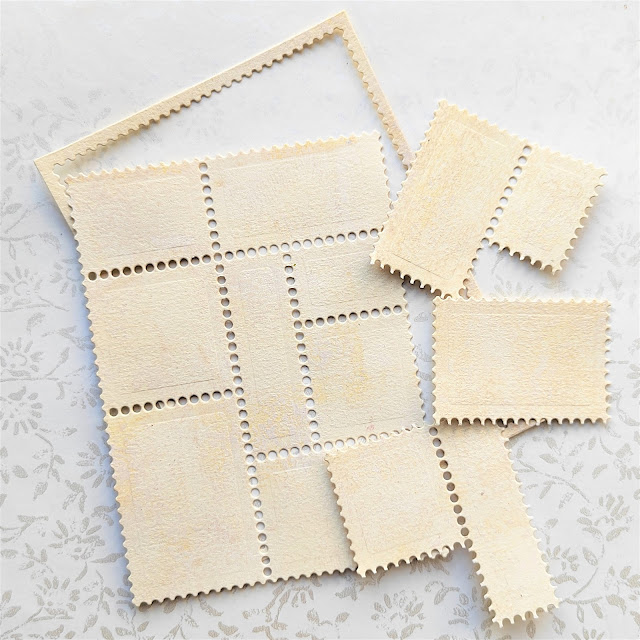
I save any paper/card left over from making the insides of journals because they will of course coordinate perfectly. Here I have die cut some using Eileen's Sizzix 'Snail Mail' Die Set; it's a good idea to cut the frame as well as the stamps - you'll see why later.


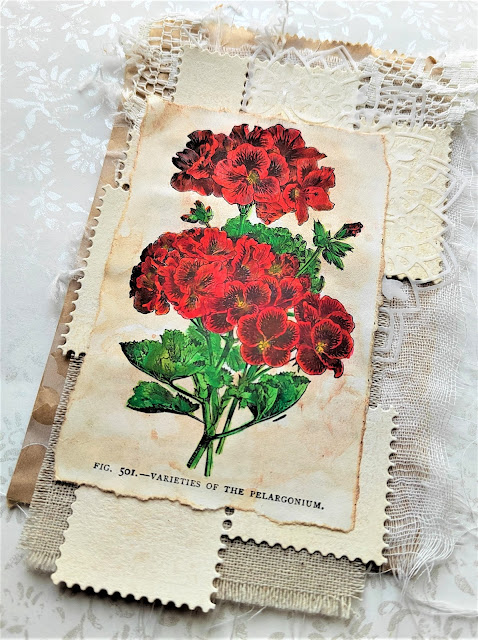
Tear apart the stamps and rearrange them over the layers of fabric before adding tracing paper or vellum die cut with one of Eileen's more delicate die designs; you can see below how I've used the Sizzix 'Mandala' Die and one of the Sizzix 'Journaling Cards, Hearts' Dies to do this.


You can draw your own flowers, die cut and paint some or (as I have here) find them in discarded gardening encyclopaedias. The one I discovered in a local charity shop had lots of botanical drawings which, when tea stained and watercoloured, make perfect focal points. At this point you can save your completed collages for future use.

And of course these fabric collages don't have to be limited to floral themes; use your own choice of images and when you have made a few scatter them throughout a new journal, leaving the remaining pages empty ready for the eventual recipient to add their own journaling.


To finish mine I added lace trim to the edge of each journal page and glued the collage pieces on top. I also like to hand stitch some cross stitches through the layers of the collage and even through the page they are sitting on.


Going back to the original photo of my two page spread you'll see how I've balanced the design on the opposite page by adding an embossed vellum flap and a coordinating butterfly cluster. Again, the blank page underneath can then be used for journaling purposes.


Taking a closer look you can see where the vellum has been embossed with Eileen's Sizzix 'Vintage Buttons' 3D Embossing Folder over-layed with one of the Snail Mail frame pieces - nothing goes to waste! The painted fabric butterfly was die cut from Eileen's Sizzix 'Birds & Butteflies' Die Set and mounted on another of those Snail Mail stamp shapes with a vintage tag and scrap of cotton lace.


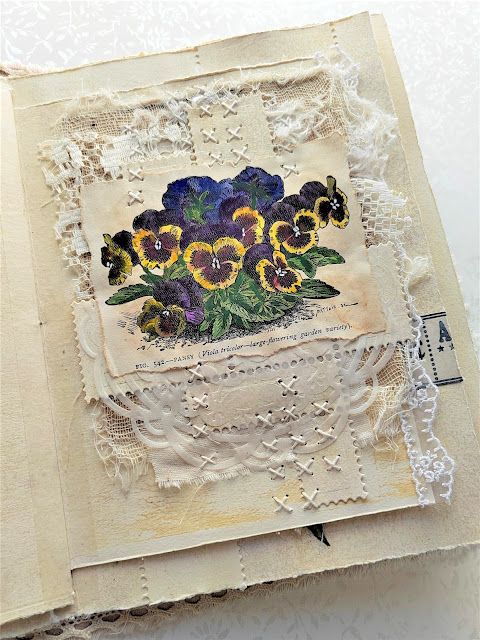
Here's the collage page in more detail, made exactly the same way and this time incorporating tracing paper die cut with Eileen's Sizzix 'Heart Mandala' Die.


And here you can see those lines of cross-stitching which have added to the stencilled collaging on the next page. Also on these pages is a scrap cluster using Eileen's new 'Snail Mail - Postage' stamp set from Maker Forte and some hand drawn leaves over a Gel Press printed background (a tutorial for this process can be found HERE). The words and patterns come from a Rebekah Meier TCW stencil called 'Mini Love and Peace' which feels very appropriate at the moment.


I hope you've enjoyed seeing how fabric and fibres can be used with your die cuts and stamps to create collages which can help fill your journal pages. Make sure to check out all the fantastic projects and tutorials from the rest of Eileen's team members - links to their posts can be found on Eileen's blog throughout the month.

For now thanks for visiting,
Jenny xxx
Related Posts Plugin for WordPress, Blogger...