30 November 2014

Twinkle, twinkle...

Hi everyone and welcome. Phew, can't believe it's the last day of November!!! I am DEFINITELY time poor right now and it's a VERY last minute entry from me for the Tim Holtz' November 2014 tag challenge...


...well I've not missed one yet and I'm not about to start now! Sadly there's no close ups (the daylight has just gone and I won't bore you with too many details. Twists on Tim's original? How about covering the corrugated card with Tissue Wrap before tearing away some of the top layer!

OK, time to be off (told you this was going to be speedy). A huge thank you to those of you who sent well wishes for the IndigoBlu workshop yesterday and to my wonderful attendees (who all went away with some magnificent Christmas cards) - you made it a very special day again ladies. There are lots more workshops to come in the New Year so keep your eyes peeled if you fancy joining in the fun.

Hope you have a great week ahead and take care of yourselves as we hit December! Jenny xxx

29 November 2014

Oh Deer at IndigoBlu

Hi everyone and welcome. Good grief, it's already Saturday again!!! I've got a post going live over at the IndigoBlu blog this morning and would love for you to take a quick look at what I've created (here's a sneak peek)...


Meanwhile I'll be over at HQ in Retford today sharing a Christmas card workshop with some lovely peeps - they've got 'proper Jenny designs' in store!

Whatever you're up to this weekend take care of yourselves, Jenny xxx

26 November 2014

A Gift From The Heart for Frilly and Funkie

Hi everyone and welcome. Over at Frilly and Funkie our wonderful host Cec has set the challenge theme 'A Gift From The Heart'. With Christmas a little more than a month away your challenge is to make something vintage or shabby chic that you can give as a gift. I've gone overboard a little with gift bag (crammed full of goodies from The Funkie Junkie Boutique of course!) and coordinating Christmas card...


If you've been joining in with The Funkie Junkie 12 Tags of Christmas 2014 challenge (all details HERE and it's not to late to start even now) sponsored by The Funkie Junkie Boutique then you'll have seen this week's superb Tag #9. Oh boy, the stencilling and layering with the heat embossed vellum on top of that black/gold background really had me won. With a new plan for an easy fold gift bag at the ready and just the decoration to settle on it seemed silly not to kill two birds with one stone so to speak.


So here's the bag (outside and inside) all created from one sheet of card. I taught my group at the demo on Saturday how to do this and it seemed to go down well. Of course with something so 3D already I could layer up that snowflake happily with Distress Spray Stain spritzed paper, acetate (can't believe how quickly the Spray Stains dry on acetate!) and a little pearl snowflake re-coloured with Alcohol Ink.


It's the perfect size for adding a surprisingly good number of those crafting goodies that you've bought for friends. Which reminds me, if you do want to stock up and spoil friends this Christmas then this coming weekend would be the perfect time to do just that. To celebrate Black Friday/Small Business Saturday/Cyber Monday The Funkie Junkie Boutique will slash it's already-low prices by 15% across the board beginning at 12:01am EST on Friday, November 28th. Linda already sells at 20% below MSRP and with the extra 15% off you will enjoy a 35% discount on your entire purchase! The sale will run through midnight EST on Cyber Monday, December 1st!!!


As the postal delivery service seems intent on charging a fortune for anything with too many layers I opted for a flatter embossed snowflake for the card. You'll see this time I sat the gold embossed tags on an altered white background as too much black on a Christmas card seemed wrong for some reason. A spot of dry brushing and some splatters were enough of a contrast and I left my pearl snowflake white too. Here are some close ups...


So that's my 'Gift From The Heart' for Frilly and Funkie. Now I urge you to hop on over to the main challenge blog to see what my super-talented team mates have created before getting your own entries linked up; as ever there are prizes for the winners.

And I'll be linking my projects to The Funkie Junkie 12 Tags of Christmas 2014.
In case you've missed them my previous creations for this challenge are HERE, HERE, HERE and HERE.

That's it for today - a gazillion things to get done before the weekend and then I'll be off teaching a workshop at IndigoBlu HQ (it's not too late to join me by the way!) Whatever you're up to take care of yourselves, Jenny xxx


23 November 2014

It's A Mega Flake!

Hi everyone and welcome. Another day another Christmas card - oh yes, they're coming thick and fast now! Hopefully you've seen three of my entries to The Funkie Junkie 12 Tags of Christmas challenge here, here and here. Now it's time to unveil my take on Linda's Tag No. 3...


Before we start here's that essential admin stuff; this annual challenge is being hosted by Linda Coughlin, the Funkie Junkie herself and has been very generously sponsored by The Funkie Junkie Boutique. The idea is that you take inspiration from each of Linda's weekly tags and create your own version, linking all 12 before December 21st to be in with a chance to win.


I absolutely LOVED what Linda had done with her tag, with the watery stamping and large snowflake being real stand out features. Having spritzed and flicked Wild Honey and Tattered Rose Distress Spray Stains over the background, I used a snowflake embossing folder with Pine Needles Distress Ink (and a light mist of water) as a stamp to replicate the original look.


The huge flake started life as a piece of card covered with Copper Kettle Mega Flakes before being die cut and embossed with the new Tim Holtz set. With dabs of ink from the Vintaj Patina set and a light rub over with Coffee Archival Ink it was ready to go. I drew around it with a Frayed Burlap Distress Marker to add a shadow and work out where to place the smaller flakes.


Using some Paper Snowflakes die cuts I covered a few in white embossing powder and others in Antique Linen Distress Glitter. The little snowflake stamp from the Mini Blueprints set was the perfect size for adding a little black detail. Finally the Simple Saying was stamped onto more of that Mega Flaked card and had a white embossed edge added.


Four down, a few more to go to catch up, and I have to say this is really proving to be the most fun challenge to take part in. With that ready made starting point courtesy of Linda, a lot of the thinking (OK, procrastination) is taken out of the creative process, leaving me free to concentrate on the overall design. Boy, does that make life easier! I hope you take a look at The Funkie Junkie 12 Tags of Christmas challenge and give it a go. Meantime take care of yourselves, Jenny xxx


22 November 2014

Patchin' It Up at IndigoBlu

Hi everyone and welcome to a new weekend! Great to have your company today. I'm out and about again, this time back on home turf at Byrkley Park Garden Centre, Burton on Trent where a certain fella in a red suit is due to rock up... just saying if you're in the area :)


As it's a Saturday it's time for my weekly slot over at IndigoBlu where I'm sharing a great layering technique that creates quick, yet effective cards. Hope you can join me over there.

Whatever you're up to this weekend have a great one and take care of yourselves, Jenny xxx

21 November 2014

He's Just A Skater Boy...

Hi everyone and welcome back. Oh boy, so many cards to share with you, so little time. Yesterday I promised you a second hit of inspiration for the current A Vintage Journey challenge 'All Sewn Up'. Remember, we are looking for Tim Holtz inspired sewing themed projects and as ever the challenge is sponsored by Country View Crafts.


My buddy Trace persuaded me that Tim's Found Relative cards were a must have, and she was so right! The occasions ones are perfect for adding a seasonal focal photo with a real vintage vibe. I couldn't resist adding stitching around this one and a hint of colour was easily applied with a Distress Marker. They are also perfect for adding remnant rub-ons or (in this case) Chit Chat stickers too as well.


No self respecting skater boy can do without a pair of skates so these Sizzix Tim Holtz ones were perfect. A little Black Soot Distress Paint on the heels, some Brushed Pewter Distress Paint on the blades and of course some matching laces and they're done.


Book pages look great when you stamp and water-colour them with your Distress Inks but they can be flimsy, so I piled a few layers together and hand-stitched them together. Plus this addition complimented the text on the background too.


Don't forget to get your entries in to our 'All Sewn Up' challenge at A Vintage Journey to be in with a chance to win. I'll be back tomorrow with a card for IndigoBlu. In the meantime take care of yourselves, Jenny xxx

20 November 2014

Do You Believe?

Hi everyone and welcome. Time for me to share another of my Funkie Junkie 12 Tags of Christmas cards, having previously shared the first one here and the second here. Today I'm taking inspiration from Tag No. 2, very much a Wendy Vecchi style one this time. Again I 'deconstructed' Linda's ideas to build the layers shown here.


OK, let's start by doing the admin stuff - this annual challenge is being hosted by Linda Coughlin, the Funkie Junkie herself and has been very generously sponsored by The Funkie Junkie Boutique. The idea is that you take inspiration from each of Linda's weekly tags and create your own version, linking all 12 before December 21st to be in with a chance to win.


Now on Linda's original tag she has very cleverly layered the stencilling and stamping onto one layer but I wanted to go with my tried and trusted layering formula to get the design right on a square card base. By stamping, stencilling and spraying the Christmas tree design onto two overlapping circles I could work out where to add the other details. You should be able to spot the reverse printing from the Checkmate stencil, the border stamping and the Merry Christmas stencilling. By sticking to a limited colour palette the way Linda did this all married perfectly.


You may be able to spot the little droplets of Brushed Pewter Distress Spray Stains on the background and I used a Frayed Burlap Distress Marker with my waterbrush to create the shadow around the circles. 


Then onto those finishing touches. Linda's idea to add the words from the License Plate Art stamp set was genius, particularly when teamed with Red Geranium Embossing Powder. I added a stencilled/embossed parcel too. Then the little metal snowflakes attached with jump rings and mirrored star provided that touch of sparkle.


This card came together so easily by using the ideas from Linda's original tag and I can't wait to share the next couple very soon.
Tomorrow I'll be back with some extra inspiration for the current A Vintage Journey challenge; I hope you can join me for that, and in the meantime take care of yourselves, Jenny xxx


19 November 2014

Dancing In The Moonlight

Hi everyone, welcome and thank you for dropping by. WOW, what a fantastic reaction to my first Funkie Junkie 12 Tags of Christmas entry! Clearly that one hit the spot - no pressure on the rest then! I'm pleased to say 2, 3 and 4 are done but I'm jumping to my entry for Tag No. 5 tonight to enable me to enter another challenge with this card...


OK, let's get the admin stuff out the way - this annual challenge is being hosted by Linda Coughlin, the Funkie Junkie herself and has been very generously sponsored by The Funkie Junkie Boutique. The idea is that you take inspiration from each of Linda's weekly tags and create your own version, linking all 12 before December 21st to be in with a chance to win. I've jumped to my card version of the Week 5 tag today.


Linda's version featured rays, stars and silhouettes and a monochrome colour scheme and initially had me stumped a little. Back to that 'deconstruction' and a little theme inspiration from this week's Simon Says Stamp Monday challenge 'To the Moon'. It occurred to me that the rays could actually represent moonbeams to work with a doily 'moon' and the scattering of stars.


I started by colouring the moon with a mist of Wild Honey and Tarnished Brass Distress Spray Stains (CAN'T live without these!!!) and having clear embossed the rays on a plain white base this also got a spritz of the DSS, this time in Dusty Concord flavour. By using a hand torn circular mask at the beginning of this process I could concentrate the colour beneath the doily. To echo Linda's stars I used the same Silver Embossing Paste through the Stars Layering Stencil in random patches, covering some of these with Pumice Stone Distress Glitter for extra sparkle. Then back to those Spray Stains, this time with a paint brush to flick droplets of Dusty Concord and Picket Fence over the stars.


The silhouette die cuts on Linda's original tag were echoed with the die cut Holiday Greens in complimentary textured card. Then I stamped mini baubles on watercolour paper, painting them with Shaded Lilac Distress Stain and Gathered Twigs Distress Ink, before fussy cutting and clear embossing them. They were hung from the branches on mirrored stars, clustered around a stamped greeting.


I think this card captures the essence of Linda's 5th tag and echoes the theme of the Simon Says Stamp Monday challenge, and I'm pretty happy with how it turned out. The plan is to be back tomorrow to share the next one. Hope you can join me for that, and in the meantime take care of yourselves (particularly those suffering those Arctic conditions in North America right now). Jenny xxx


18 November 2014

Those Funkie Junkie Tags...

Hi everyone and welcome, including my latest followers - it's so exciting to see those numbers gradually build and I always appreciate you joining me. First up, in my last post I mentioned running a workshop at JGD Crafts on Saturday, and what a great time we had. The group were really enthusiastic and so welcoming, and our host Janet was a real gem. She is clearly a master organiser, and we were spoiled rotten with the most wonderful buffet, complete with handmade/decorated cupcakes! I can see why they come back for more:) Thank you to you all for making it such an enjoyable day.


I returned home and took a quick flick through Blogland to be greeted with some fantastic news... a win for my Inspired by Rust piece!!! Thank you so much to the team at Artist Trading Post for this honour - you added the cherry on top of the cake for my weekend!


And so on to the business of the day. For the past couple of years I've joined in with Linda Coughlin's 12 Tags of Christmas challenge because it is a great way to get those festive cards made in time. I may have been making Christmas projects since the beginning of the summer (actually it feels like the beginning of time right now!) but as none of those are for personal use the pressure is now. The joy of this challenge is in Linda's inspirational tags, each of which give your mojo a kickstart. And of course no challenge would be complete without a prize; with sponsorship from The Funkie Junkie Boutique there are gift certificates for the winners and discount coupons for everyone who enters!!! Woohoo!!!


Here's my take on Tag 1. My approach this year is to 'deconstruct' the elements on Linda's originals (ha! it's not just the chefs on Masterchef that can do it!) and layer them onto a card. So we have the Holiday Knit stencilled tag, with a coordinating stencilled layer on the base. Then there's stamped spruce leaves, various ephemera elements (courtesy one of Tim Holtz' ephemera packs) and some metal embellishments. Here are a few close ups...


One down, another three already completed, four more to do to catch up - it's do-able! And if you're thinking "Yeh sure, just not for me", remember you've got until December 21st to get them all done and linked - anything's possible...

I'll be back tomorrow with the next one. In the meantime take care of yourselves, Jenny xxx


15 November 2014

A Simple Wreath at IndigoBlu


Hi everyone and welcome. Phew, so we've made it to another Saturday and it's my regular slot over at IndigoBlu today. I'm keeping it simple this time with a quick and effective way of making an elegant little number for Christmas. Hope you can join me over there for a closer look.

I'm out and about again today at JGD Crafts in Sutton in Ashfield with the lovely Janet Humphries, running a one day card workshop - and I believe there are treats in store for us there!

Whatever you're up to this weekend take care of yourselves, Jenny xxx

14 November 2014

All Sewn Up at A Vintage Journey

Hi everyone and welcome. Brenda is our host for the latest challenge at A Vintage Journey. This is simple - a sewing inspired creation, any style as long as you tell us what the Tim influence is in your project (that could be that you have used a Tim technique, some of Tim's products, maybe you will case one of his tags but make it sewing based, you choose but please make it clear what the Tim influence is as so many people disqualify themselves from being able to win the prize as we are not sure how it fits to our challenge blog. Be adventurous and make whatever you like, it doesn't have to include real sewing but must be focused within that theme. So what are you waiting for?


Christmas is now looming and I need to get a start on cards for friends and family (with DT samples pretty much done and dusted). So thoughts turned to how I could incorporate a seasonal twist on the sewing theme. As is always the case for these challenges I headed straight to Tim's blog for some ideas and techniques and (of course) wasn't disappointed!


The Holiday Knit stencil is of course ideal for any sewing based project and Tim's use of texture paste and Distress Stain Sprays are perfect for use with it. I added extra machine stitching to to background and also rubbed Archival Ink over the raised areas to contrast with the faded look of the base colour. Layers of inked lace and paint splatters helped to make the dressform stand out better. And yes, that is hand stitching you can spy on the bookpage holly leaves. To finish, particularly if you are lost for words, Chit Chat Stickers are always there to help.


Despite the lack of daylight in this part of the UK I hope you can get a sense of the vibrancy of this card. It was such fun to create and makes a start on that card list... To see more from my talented team mates make sure you head over to A Vintage Journey before hitting those sewing themed tools and textures. I can't wait to see what you come up with. Remember, for winners we are generously sponsored by Country View Crafts and there are chances to join the Creative Guides up for grabs too.

I hope you'll pop back tomorrow for something new for IndigoBlu...
In the meantime take care of yourselves, Jenny xxx


Products used can be purchased from Country View Crafts

13 November 2014

Hometown at Christmas

Hi everyone and welcome. Think I just might have mentioned in my post last Saturday being lucky enough to have gotten my paws on Ken Oliver's 'hot off the press' Hometown collection, newly released at the NEC - yep, I was excited!
And here's the proof... (how amazing to get to meet the man himself!!!)


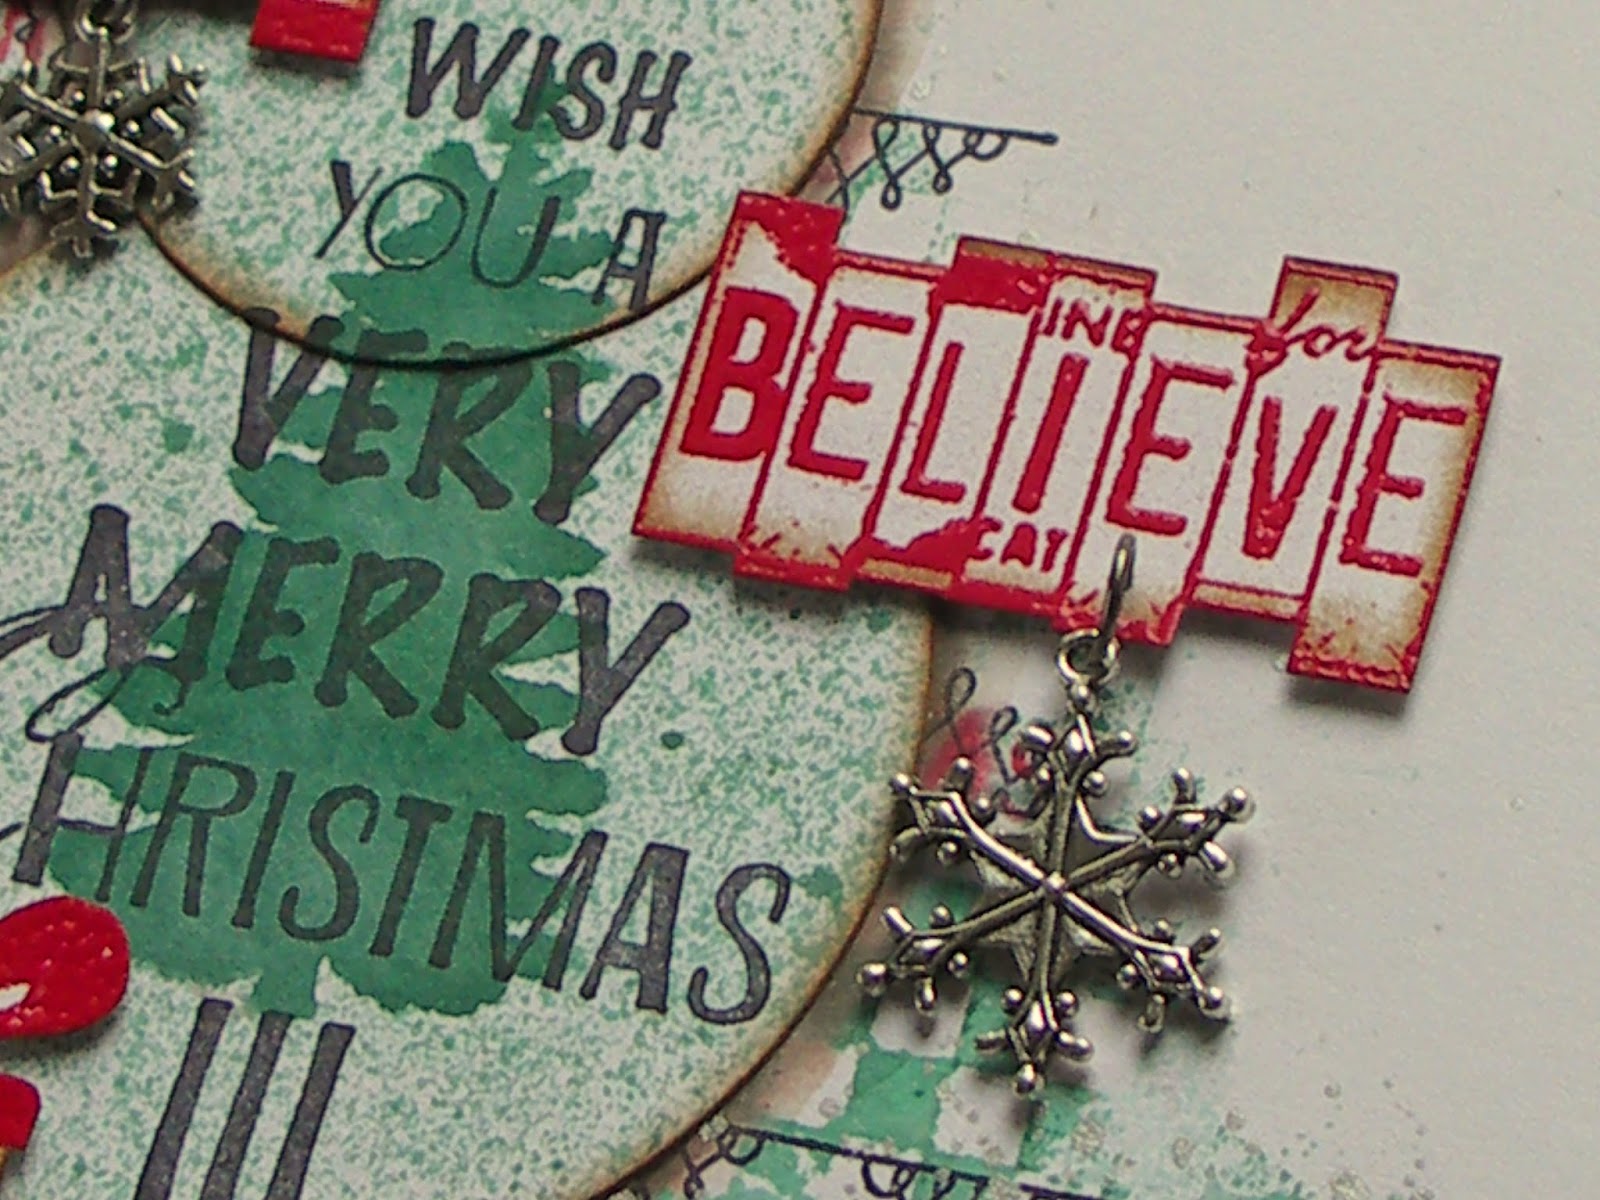
Ken mentioned how he saw these papers being used for mixed media projects and that was music to my ears. I had so many ideas buzzing around involving lots of the IndigoBlu paints and stamps I'd been demo'ing that day. And then came the time to put it all into practice; that's always when the nerves set in - will this look right when it's done (there's no template to follow when something is brand new) will I just wreck the designs by overdoing it all, will it then translate when photographed? I'll let you be the judge of that...


The designs are architecture heavy and detailed, so getting the balance right on a 6" square card takes thought. Thankfully Ken has cleverly included a sheet of journalling cards with the same large designs in a scaled down version, so I took the opportunity to layer them so the background could be altered with impunity. Both bases got a layer of gesso and a Snowflake Lace/Goldfinger English Cottage Artist's Acrylic Paint border to work with the tones already in place on the papers. That kicked off the Christmas theme. Then came stamping, Mega Flakes, ribbon and die cuts to enhance the designs (I've included a list of ingredients/links at the bottom of this post). And of course those fiddly die cut shapes became so much easier to deal with using my other Ken Oliver purchase - Stick It! Genius stuff; it not only acts as an adhesive - with a waxy finish to the carrier sheet, it also allows those intricate cut designs fall from the dies.


So what do you think? It's way too hard to get perspective myself having looked at them for so long and your critical feedback is always welcome. With a few more gorgeous sheets to play with it's another one of those creative learning curves to make sure I do them justice.

OK, tomorrow there's a new challenge launching at A Vintage Journey so I hope you'll join me for that, then Saturday is my regular post for IndigoBlu (plus I'm teaching at JGD Crafts in Sutton-in Ashfield for the lovely Janet Humphries). Is it just me or is November disappearing rapidly?!
Thank you so much for joining me today and whatever you're up to, take care of yourselves, Jenny xxx

Ken Oliver's Hometown collection and Stick it available at; Craft Obsessions
IndigoBlu products used -
English Cottage Artist's Acrylic Paints: Peppermint Tea; Townhouse Teal; Goldfinger
Gee-Sso Good!: White; Black

12 November 2014

It's All About Wendy at Frilly and Funkie

Hi everyone and welcome. I'm hosting the latest challenge over at Frilly and Funkie and the theme is 'It's All About Wendy'. We are celebrating all things Wendy Vecchi for this challenge so let's see your 'Wendy' style projects. If you are unfamiliar with her products and style take a look at her blog HERE and her Pinterest boards HERE as well as at the amazing projects created by the Frilly and Funkie Design Team.


As soon as I saw the dress up doll stamps this idea popped into my head. Wendy loves to shop (shoes I believe but she hasn't produced stamps of those - yet!!!) so the idea of walking into one of those designer stores where the clothes are displayed to look like artwork seemed perfect.


The base used her Basically Bricks stencil - I applied Pumice Stone Distress Paint through before putting Embossing Paste through onto selected areas. When dry a little more of the paint was added over the embossed parts before the whole thing was misted with Antique Linen Distress Stain Spray. Finally I added a few dots of Orange Blossom Archival Ink through the Dots and Stripes stencil and splattered a few drops of Black Soot Distress Paint on top.


Now attention turned to the stamping. The joy of the Paper Doll is that you can fussy cut her dress to give her a look to match your project. In this case I used lots of the Archival Inks and edged each dress with a skim of Walnut Stain Distress Ink to get rid of those dreaded white edges.Her matching bow was made by stamping the Reverse Dots background stamp onto the bow stamp (a technique called 'kiss stamping').


And so to the finishing touches; it's a little difficult to see from the photos but I used the License Plate Art stamps to add some 'graffiti art' to the designer shop walls (using one of my all time 'go to' colours - Watering Can Archival). Then I hung the dresses on Idea-Ology hangers and added an appropriate sentiment. I think we could apply this one to visits to craft stores as well as clothing outlets!!!


Hope you like my take on Wendy's style. For even more awesome inspiration head over to see the projects my team mates have created at Frilly and Funkie. Then it's your turn - how would you interpret Wendy's style? Don't forget, there are prizes up for grabs for the winners.

I'll be back soon to share more cards (personal Christmas ones are now coming along!!!) For now take of yourselves, Jenny xxx


8 November 2014

Inspired By Rust at IndigoBlu


Hi everyone and welcome. Well, it was all systems go at the NEC yesterday! I got to meet up with the lovely Patricia and Nikki, saw the wonderful Hels Sheridan in action and Kath Stewart wowing her adoring public on her birthday, said a quick hello to Rosie (of Pergamano fame), caught up with IB teamies Nikki and Laura and got to lay my paws on the new papers from Ken Oliver having met the man himself! And to top it all Kay and Alfie were mad enough to let me loose on the IndigoBlu stand for a few hours with paints and stamps - happy days!!! Thank you to all those who stopped by to say hello and join in the fun.

Today I'm sharing something completely different over at the IndigoBlu blog, totally inspired by the current Artist Trading Post Exchange challenge. I hope you get chance to hop on over and take a look at the completed canvas.

For now have a great weekend and take care of yourselves, Jenny xxx

1 November 2014

A cupcake is not just for Christmas... at IndigoBlu


Hi everyone and welcome to the weekend. Phew, it's been a hectic few days here and today I'm sharing a non-Christmas card idea over at IndigoBlu. Hope you can join me over there to take a look at the full card.

And in case you missed out on the past couple of days I shared A Grateful Welcome mixed media home decor project on Wednesday, Christmas wrapping ideas/tutorial for Technique Thursday, and a Distress Inks tutorial for Friday Focus.

Phew, this weekend has family visits booked in so I'll be taking a well earned rest from the craft room. Hope whatever you're up to this weekend you have a happy and relaxing one and take care of yourselves, Jenny xxx

Related Posts Plugin for WordPress, Blogger...