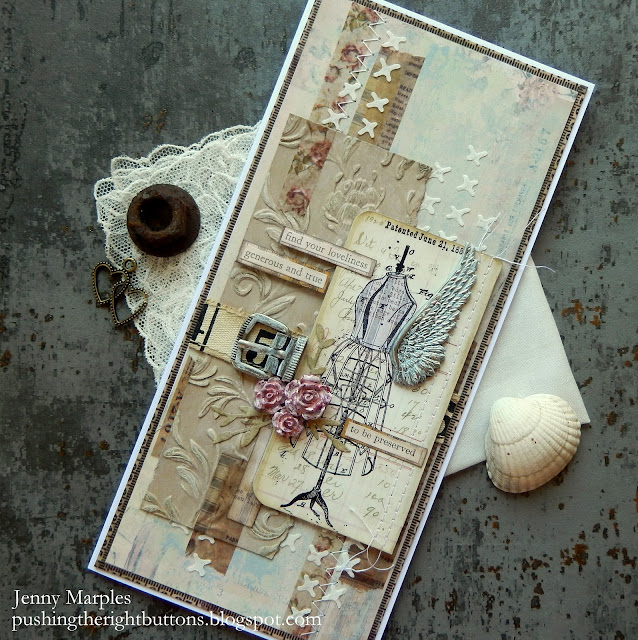
I'll take you through how this card came together further down but first another of my tutorials for using Tim's 'Botanical' 3D Texture Fades Embossing Folder.
Layered Distress Paint Embossing
I began (as has been the case with the other three tutorials) with a piece of Tim's Mixed Media Heavystock paper as it will take layers of paint, ink etc without warping. First up it was covered with Brushed Corduroy Distress Paint.
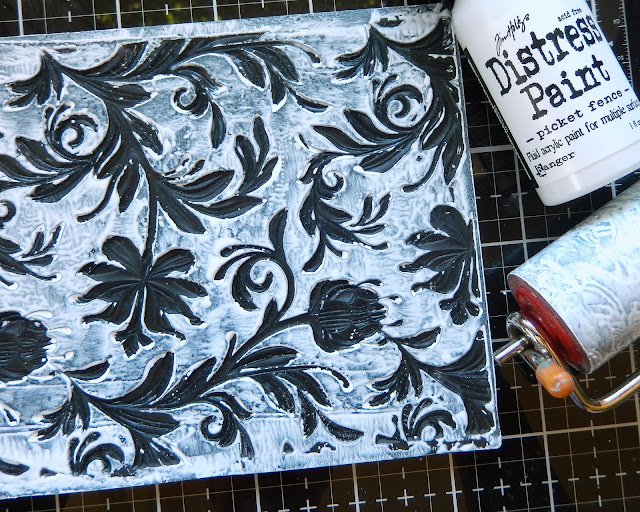
Once dry I applied Picket Fence to the flatter side of the 'Botanical' 3D Texture Fades Embossing Folder and ran it through my Big Shot (painted side down). i find Distress Paint is idea for this technique as it is more fluid than other paints and has a longer drying time so the paint remains wet as you emboss. Obviously it's important to clean your embossing folder with water as soon as you've finished to prevent it from sticking.
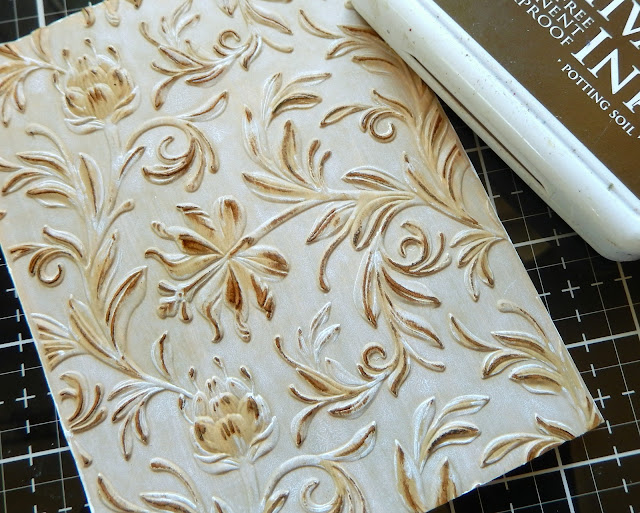
Once the paint was dry I rubbed Potting Soil Archival Ink over the raised surface just to emphasise these spots (because it's a permanent ink so won't bleed through to upper layers).
Finally I added more of the Picket Fence Distress Paint to the raised areas using a brayer. This may seem daft, I mean why go to the trouble of adding the ink previously? Well I tried without and just didn't get the same vintage look that this combination gave.
This piece of card was torn in two for use on this and another card (HERE). This one was layered onto a background created from a piece of Tim Holtz 'Memoranda' Paper Stash brayered sufficiently with Distress Paint to make it more uniform without obliterating the design beneath. Coordinating Design Tape was used to create the layout over which I added another of those Collector Layers, stamped with the dressform image from Tim's 'Inventor 3' stamp set. A huge shout out to Zoe Hillman who I've seen use Design Tape as a border and use Ruler Ribbon with a buckle to such great effect. There is also some stencilling using the Stitched Layering Stencil and some red Halloween Heirloom Roses with drops of Shell Pink and Snow Cap Alcohol Ink added to replicate the look of the roses in the Design Tape.
That's it for today's post. I hope you've enjoyed seeing it in more detail and give the embossing tutorial a try. As ever if you have questions please let me know. For now have a great end to your week and get creative!
Jenny xx
Products used in this card;


Jenny you cards are getting better and better, and I just had to come by and say how much I just LOVE this one!! From the brayered memoranda background to the wing on the dress form with all the wonderful layers in between
ReplyDeletethanks for the tips Jenny. Appreciate you sharing your ideas and techniques. Gotta try the Distress Paint on the folder!
ReplyDeleteJenny, this is just beautiful. Thank you so much for sharing your techniques. I simply must have this folder now!♡♡
ReplyDeleteI agree with Astrid! Each card is slightly more wonderful than the one before. I love the many different ways you are creating backgrounds with that embossing folder! Scrumptious!
ReplyDeleteStunning layers. Loved the Distress Paint technique. I must try that. Jenny -- you never cease to amaze me with your beautiful work. Mary Elizabeth
ReplyDeleteA stunning card Jenny, loved the paint technique using the embossing folder .... just brilliant. All the layers work so beautifully together x
ReplyDeleteJenny, your card is simply divine! The layers of paint on the embossed piece are gorgeous, and I've now got a renewed love for my halloween roses. Thank you for sharing your incredible talent and your gorgeous work, I am sorry that its been a while since my last visit, a family emergency has kept me away. hugs
ReplyDeleteLayers of fabulousness! I love the embossing and stitching and of course the distress roses. Gorgeous piece!
ReplyDeleteOMG I so love your layers... simply gorgeous !
ReplyDeleteI love seeing your cards come through my FB stream and so I came over to see how you created this masterpiece. I absolutely love it.
ReplyDelete