Hi everyone and welcome. Today sees the release of a new set of rubber stamps from Eileen Hull Designs in collaboration with Maker Forte. Named 'Making Plans' it features a number of labels shapes with words and phrases sized to fit inside.
In case you missed it Eileen hosted a FB Live on 26th April where some of the team shared ideas for using the new stamps. For my part I have made a new journal using Eileen's Sizzix Scoreboards 'Box, Book' XL Die and added tabs for the pages using the new stamps.
Here's how you can recreate this journal, starting with the covers which are cut using the Sizzix Scoreboards 'Box, Book' XL Die - you will need two of the large rectangular shapes (the box top and bottom) and a spine piece from matboard. Cover the rectangular pieces with paper embossed using Eileen's new Sizzix 3D Embossing Folder 'Crochet Mandala'. Once the glue is dry you can paint the front, back and spine and ink the edges with permanent brown ink.
To replicate the spine on the old 'Passport Book' punch holes at 1 inch, 3 1/4 inches and 5 1/2 inches as shown below.
Glue the covers to the spine along the two outer score-lines holding them together with clips until completely dry. You are now ready to fill your book with signatures and decorate it.
At this point I decided to change the colour to a salmon red, running a darker red permanent inkpad over the top of the Crochet Mandala covers to make the pattern stand out more.
Die cut, paint and assemble the little houses using Eileen's Sizzix Thinlits 'Shadowbox Elements' Die Set. I replicated colours seen on the buildings of Italy's Cinque Terre.
I used one of the new PaperArtsy Hot Picks Mini Stencils to create an archway, pulling paste through it before painting the little houses to match the die cut ones.
Assemble your houses into little villages and glue together before adding them to the front and back covers of your journal.
To finish cut the cloud shape from the 'Shadowbox Elements' Die Set out of some clear plastic packaging to use as a stencil with some white and yellow paints. Then repeat the process using the large flower shape, using brighter yellow paint to create a sun.
I chose to glue some thin gauze to the inside of the entire cover at this point using a gel medium to help strengthen it and add texture to the finished journal. If you cut a piece that is slightly larger than the finished cover you can trim back the excess or leave the frayed edges exposed.
For the signatures cut and fold in half six sheets of paper measuring 10 inches wide by 6 1/2 inches long, folding them in half and repeating to make three sets. Punch holes through the signatures along the fold lines using the holes in the spine as a guide. Then tie the signatures into the spine through the holes using strong thread or thin yarn.
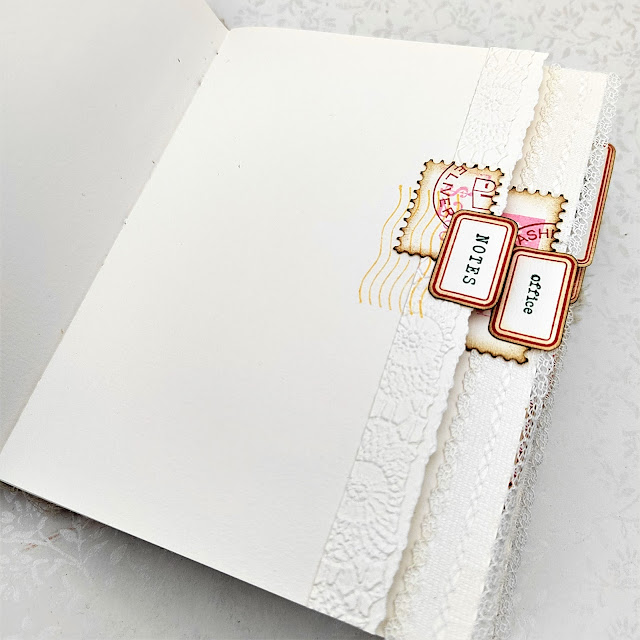
Once the signatures are tied in tear some of the pages so they are of uneven widths before trimming with the torn strips (embossed with the 'Crochet Mandala' Embossing Folder) and some lace. I then stamped labels and added words using Eileen's 'Making Plans' Stamp Set to stick onto the edges of the pages.
These are just a few of the 36 finished pages - you'll see I also used Eileen's Sizzix Thinlits 'Snail Mail' Die Set to cut stamp shapes and stamped on them using images from her 'Snail Mail Postage' Stamp Set. The pages coordinate more if you use inks that match the colours on the journal cover.
For now thanks for visiting,
Jenny xxx


Beautiful project. Love what you did with the embossing folder.
ReplyDeletelove love love it!! =)
ReplyDeleteSuch innovative ideas Jenny! I always know I will be surprised and delighted when I see your latest creation <3 So many cool touches- I especially like using the Crochet Mandala on tthe edge of the page- so delicious! Beautiful as always!
ReplyDeleteLove it - so inspiring. Ax
ReplyDelete