Today I'm back to share something new - a Camper Retro Style Accordion Photo Album which uses Eileen's new 'Camper' Scoreboards 3D Die along with a couple of other Thinlits die sets from Eileen's collection, including the new 'Card, Waterfall & Tags' set. The outside cover of the album is a 1950's style camper complete with glazed windows and colour coordinated blinds as well as the touches of rust, inevitable for a vehicle of this age. Inside are retro patterned accordion pages, pockets and tags displaying vintage vacation photos and complimentary words from Alison Bomber's stamp sets.
For now thanks for visiting,
Jenny xxx
Here's how the album came together, starting with the camper covers; as well as cutting the sides, 'wings', and stand pieces I cut four doors, chopping two of them in half so that a second supporting layer could be added behind each of the window frames. I also cut four window frames, two for the sides and two extra for the door windows. To build the wheels I cut the two wheel pieces, thinning out the middle sections to create a sunken wheel trim for each wheel, before mounting them onto large circles of board painted black to match the wheels.
The main body of the camper and wheel hubs were painted with 'Aquamarine' Fresco Finish Paint whilst the side panels, doors and windows were covered with white gesso. Finally the wings, hub caps, door window frames and stand pieces were painted with silver paint. To add the touches of rust I began by sanding back small areas on each element. Then a small paint brush was used to apply tiny drops of Butterscotch Alcohol Ink.
To add to the aged appearance of the camper covers I used a cotton bud to apply silver Luster Wax from Sizzix to some the edges of each element; this was intended to simulate the look of aluminium, revealed when paint is worn away from exposed areas of the vehicle.
To create the double-sided paper for the album pages I wanted to make something bespoke with a 1950's style retro. A custom stencil was cut from the acetate packaging around the Camper die using rectangles from Eileen's 'Credit Card Sleeve & Tags' Thinlits Die Set and the 'House/Pocket' Stitchlits Die Set, with the 'starburst' element from the 'Stitchy Flowers' Thinlits Die Set. I also found a freebie stamp from an old issue of Craft Stamper Magazine which matched perfectly. If you are not so confident with creating your own papers this stage could be skipped by selecting coordinating double-sided patterned paper.
Below are the Fresco Finish Paints used through those stencil sections onto A4 pieces of white card starting with the rectangles and ending with the starburst and stamped images. The stencilling and stamping was repeated on both sides of two pieces of card for this album.
With the white sections standing out too much I applied some tea stain to both sides of each piece of card and allowed them to air dry. This wrinkled the card a little so I took advantage of this by lightly sanding it back, catching the raised areas to give the impression of imperfect, aged paper.
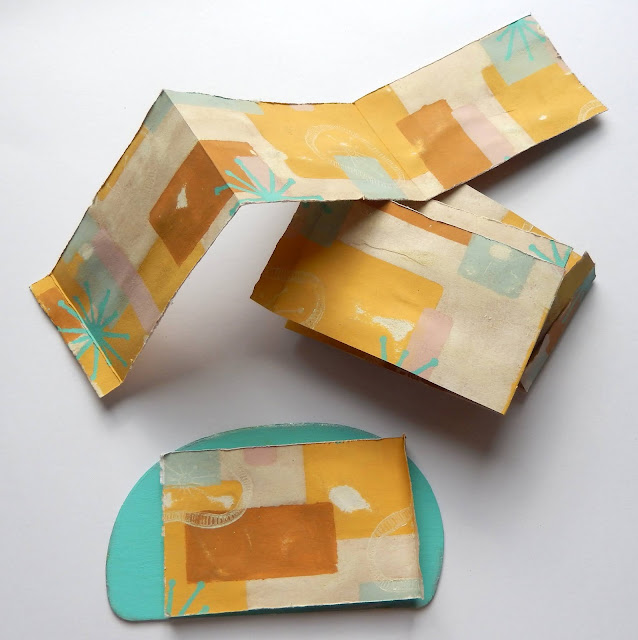
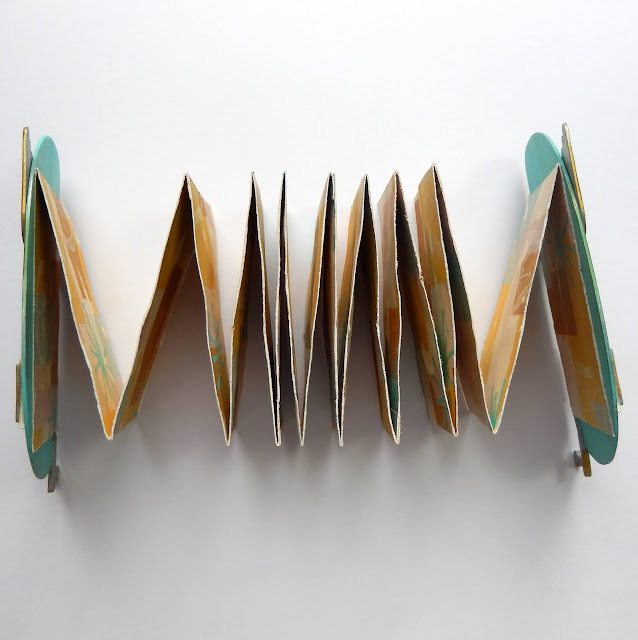
To fit inside the camper covers I cut three horizontal strips 6cm wide from each sheet of patterned paper. These were scored and folded at 9.5cm, 19cm and 28.5cm intervals, leaving a small piece at the end to use for joining to the next strip. With all the strips connected in one long accordion fold length, each was glued onto the reverse side of each camper cover. They should sit within the edges of the covers.
Below shows how the finished accordion looks when attached to the covers;
Since this was too long and unwieldy I decided to create pockets by joining some of the sides together using strips of 1/8 inch red tape liner. To disguise the joins I chose those sections to use as the pockets as shown below.
Here is how the accordion pockets looked when stuck together, three pockets on one side and two on the other.
From the remaining paper left after cutting the page strips I used the scalloped edge die from the 'Card, Waterfall & Tags' Die Set to cut two sections for the blinds on the windows.
The scalloped edge pieces were cut and mounted behind each of the windows and doors before they were glued in place on the camper bases. I then filled each window section with Glossy Accents to 'glaze' them.
To secure the stand sections more firmly I marked around the angled sections and cut into the reverse side of each camper cover so the stands could be 'set in' to them.
To complete the album I used the remainder of the patterned paper to cut strips that could be layered over white gesso'd tags, cut using the 'Card, Waterfall & Tags' Die Set. To make them fit easily into each pocket the sides of each tag were trimmed to make the overall width 5cm. I also chose to add some slow stitching across some of the pages and the tags.
I am indebted to my team mates Lisa Hoel and Betsy Skagen for providing me with some fabulous vintage vacation photos that were printed and mounted on the pages and reverse sides of the tags. I also stamped some verses from a number of Alison Bomber stamp sets from PaperArtsy which fit with the vacation theme. Here's a look at more of the finished album (including a photo of a young Lisa!). You can take a closer look by clicking on each of the images.
I hope you've enjoyed seeing how Eileen's dies have been used to create this accordion album. Make sure to check out the projects and tutorials from the other Inspiration and Educator Team members - links to their posts can be found on Eileen's blog throughout the month.
For now thanks for visiting,
Jenny xxx


This is so delightful Jenny! I love all the photos Betsy sent you. Let's see if anyone can figure out which photo I'm in LOL
ReplyDeleteWhat a wonderful photo camper book Jenny! Love the 'vintage' vacation photos and great retro colors and stampings on your pages!
ReplyDeleteI’m trying to figure out if it’s Lisa getting sunscreen no her back? Jenny I love how you aged the camper(such a pretty color!) with alcohol ink! And the accordion book Is such a cool idea- just so well thought out and executed as always 👏👏👏
ReplyDeleteFabulous project
ReplyDeleteThis is totally AWESOME!!!
ReplyDeleteMy ChiefHubby and I own 2 campers - one is a large home in Florida & the other is for camping with our group of Besties. I’m going to try this out at some point this year & add photos from our years of group camping!! I can only hope mine turns out as STUNNING as YOURS here!!!!
is is totally AWESOME!!!
ReplyDeleteMy ChiefHubby and I own 2 campers - one is a large home in Florida & the other is for camping with our group of Besties. I’m going to try this out at some point this year & add photos from our years of group camping!! I can only hope mine turns out as STUNNING as YOURS here!!!!