29 May 2023

Die Cut Mania (Part 2) with Eileen Hull Designs

Hi everyone and welcome. This month's theme is Die Cut Mania where the team are sharing tips, tricks and techniques for using with your dies. I've already shared one idea this month (see here) and am back with another suggestion for you. So many people feel nervous about drawing but this is where your die cuts come in - use them either as things to be painted on or use them as templates and get creative! We'll be exploring each method in turn, starting with painting on your die cuts.


Over the past few years Eileen has designed a number of floral and foliage dies and for this collage page I started by cutting some from the Eileen Hull Designs Sizzix Thinlits 'Shadowbox Frames #1' Die Set using thin white card. Think about whether you want to add a couple of layers to the flowers for extra petals and remember you can turn them over, flip them around and even chop into them to make different options.


Time to get the paint out! Even if all you have to hand is some black, white, yellow and green paint you can still make a huge impact with your die cuts. Paint the main elements with a base hue before mixing the black to make a slightly darker shade and adding white to make a lighter tint. Think about where the light (usually the sun!) is coming from and add the darker shades on the far side. Then add the lighter tints to the sunny side and finish with a touch of white for extra highlights. You'll see below how the centre of the daisies in particular is made to look more dimensional by using this method.


Create a layered background using translucent pieces, in this case dyed tissue and sewing pattern tissue; you could also use things like napkins and gel printed tissue. Try stencilling through another of your die cuts to create a delicate pattern. I used the Eileen Hull Designs Sizzix Thinlits 'Mandala' Die for this and applied a little paint through the design. Notice how I've also used a couple of pieces from the new Eileen Hull Designs Sizzix Thinlits 'Mini Slimline & Tickets' Die Set at the top and bottom of the page. This is a running theme through each page of the journal so that, even though it is being created over many months, there is a common motif linking each page to the last.


And here's a close up of the finished daisies; you'll see I've added a tiny flick of deep pink ink at the edge of each petal having taken a closer look at the real ones when on a walk recently. 


Now we turn attention to an example of using your die cuts as templates on another collaged page.


This time start by creating the background with more of those layers of book print, sewing pattern tissue and gel printed tissue. Tie all of these individual elements together by adding some stencilling over the top; I used Eileen Hull Designs Sizzix Thinlits 'Skinny Mini Elements' Die to cut a template through which I could apply paint.


Choose the die cuts you want to use as your templates and cut out one of each in plain card; I used the leaf and petals from Eileen Hull Designs Sizzix 'Sunflower' Bigz L Die, working out where to place the flower and leaves before drawing around them with a pencil.


Starting with the leaves, paint with a mid-toned base colour and draw in where you want the veins to run.


Paint in those veins and some shadows with a darker shade.


To finish the leaves add a lighter shade to the centres to create highlights and if necessary return to the base colour to tone these down towards the base of the leaves.


Now it's time to add the first layer of the sunflower, drawing around the largest of the petal templates.


Once again paint the petals with a mid-toned yellow; notice you can skip the middle as it will be covered by the centre circle.


Working in stripes add darker yellow/orange paint to the inner parts of the petals and lighter pale yellow/cream to the outer parts. Finish by going back over with delicate strokes of the initial yellow paint.


Slightly offset the large petal template over this first layer and draw in the second layer of petals.


Paint these petals in the same way as the first layer. Add the third layer in the same way to complete the outer part of the sunflower.


You have a choice to make here - either keep it simple and add the central section or use the smaller petal die cut as a template for another couple of layers of petals.


I went with the more detailed version, adding the smaller inner petals and painting them in the same way as the outer ones. I found I only needed two layers of these to make it look 'full'.


It was at this stage I added the central section, drawing around the circular die cut and painting it with a dark brown before using a stencil brush to dot on yellow highlights. And the flower now complete.


Using stamped elements from Eileen's Maker Forte stamp sets in the same neutral colour as the journal page helps give extra detail without detracting from the main feature, the sunflower. Add painted stamp shaped die cuts to coordinate with the stencilled collage background closer to the sunflower for the same reason.


Thank you for joining me today. I hope you have some ideas for using your die cuts to help you add 'drawn' details to your collages. Make sure to check out all the fantastic projects from the rest of Eileen's team members - links to their posts can be found on Eileen's blog throughout the month.

For now thanks for visiting,
Jenny xxx

15 May 2023

Die Cut Mania with Eileen Hull Designs

Hi everyone and welcome. This month's theme is Die Cut Mania where the team are sharing tips, tricks and techniques for using with your dies. I know we are all familiar with using our Eileen dies to cut regular coloured and patterned paper but have you thought about using some of those other fun techniques for decorating your die cuts? As part of today's tutorial I reached for some crackle glaze and used the results to create backgrounds for several journal pages.


I started by using PaperArtsy Crackle Glaze as directed with dark and contrasting pale shades of PaperArtsy Fresco Finish Chalk Paints on thin card to create a crackled look. You could also employ your embossing powders, stencilling, stamping and more to make your own decorative paper too. I would recommend using thin card/thick paper to ensure your your more intricate dies can cut through perfectly. You'll see below how I've cut some of the paper with Eileen's Sizzix Thinlits 'Heart Mandala' Die.


Once you've got your die cut created use it as a template to draw onto your journal page. Work out where you want to put your die cut and then draw/paint/colour the shape to make a background. It's a great way of adding a delicate pop of colour onto an otherwise neutral page.


Glue your Crackle Glazed die cut over the painted background before adding your stencilling and stamping - Eileen's 'Snail Mail Postage' Stamp Set is perfect for this.


And finally create your focal point; I wanted to mount a Rebekah Meier designed butterfly on something and found a piece of book paper that I'd previously die cut an Eileen tag from. A piece of vellum, embossed and inked using Eileen's Sizzix 3D Embossing Folder 'Vintage Buttons', worked well in the tag void and a little stencilling and stamping finished off the piece.


And here's the finished journal page; I used handles fussy cut from Eileen's Sizzix 3D Embossing Folder 'Silverware' to decorate the facing page and also popped on a few postage stamp shapes cut using Eileen's new Sizzix Thinlits 'Mini Slimline & Tickets' Die Set.


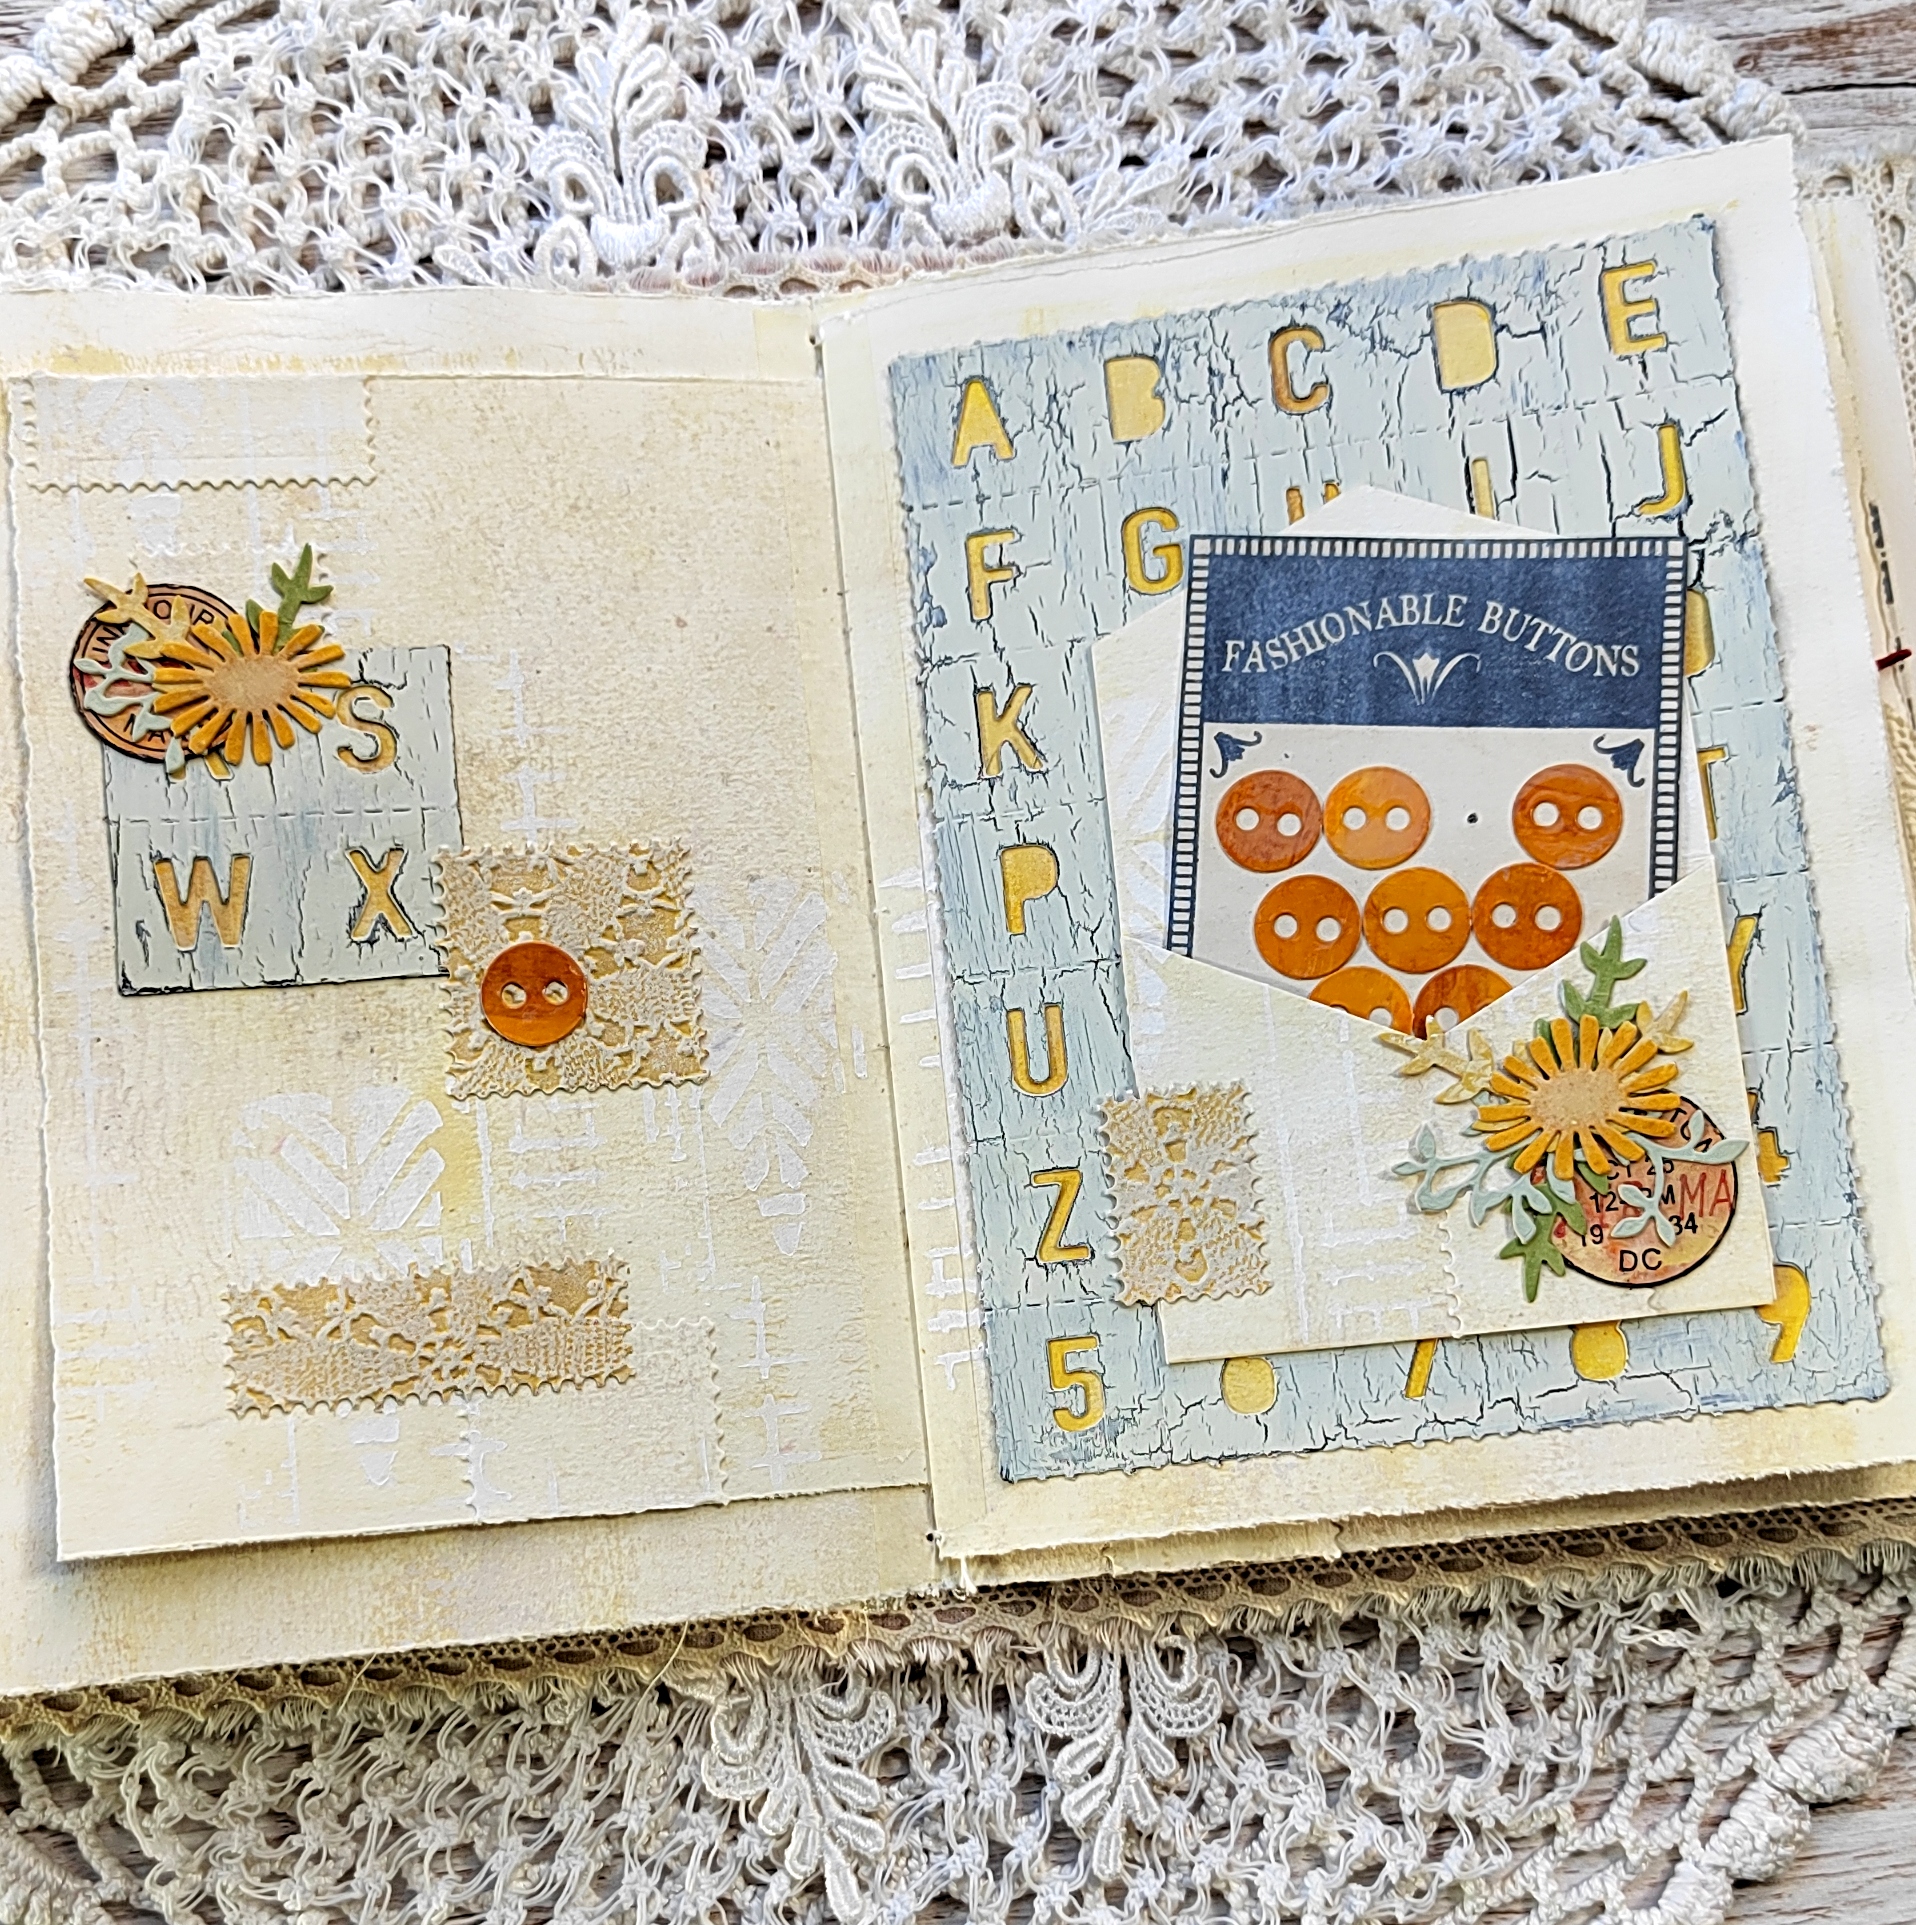
Here's a second journal page using the same techniques, this time with Eileen's Sizzix Thinlits 'Tile Alphanumeric' Die. Notice how some of the die cut postage stamp shapes have been embossed and painted whilst Glossy Accents has been applied to the die cut buttons.


My final journal page is a single page at the front of this book so I wanted to add one of Eileen's stamped library cards in a pocket envelope. To act as a background the crackle glazed paper has been die cut with the Sizzix Thinlits 'Skinny Mini Elements' Die and once again the page beneath has been painted. More of Eileen's stamped elements have been layered up to add even more interest to the page, including her 'Vintage Damask' design.


Thank you for joining me today. I hope you feel inspired to try using lots of your mixed media techniques on paper so you can die cut them for your own journals. Make sure to check out all the fantastic projects from the rest of Eileen's team members - links to their posts can be found on Eileen's blog throughout the month.

For now thanks for visiting,
Jenny xxx

17 April 2023

Eileen Hull Designs Sizzix Chapter 2 Art Journal

Hi everyone and welcome. Throughout April Eileen Hull's teams are continuing to share projects made using the new Sizzix Chapter 2 collection. To recap, there are three dies in the set: the Card Case, Mini Slimline & Tickets and Journaling Card, Envelope & Windows.


At the beginning of the month Eileen hosted a Release Party during which I shared a peek at a new Art Journal created using all of the new dies (and more besides!) Today I'm back to show you more of the pages inside, but before all that a quick update on how they were bound together and inserted.


The covers of the Card Case open in a folio style so I decided to add the pages by stitching them together with Coptic Stitching before securing them inside each cover with fabric. Treat each side as though it is a separate book like this;


During Eileen's Live I was asked how I bound in the pages so here are some photos from an older tutorial of mine. I start by making holes in the centre of each folded page (or in the case of the envelopes in the centre of the main fold before they are glued together at the sides). Make an odd number of holes - more holes give more stability.


Next, complete the Coptic Stitching using a strong thread - there are loads of video tutorials on YouTube showing this which I highly recommend as the easiest way to learn.


Once stitched together add bookbinding glue or PVA glue over the edges of the stitched pages and stick onto a piece of thin fabric, taking care not to glue the sides of the end pages to the fabric. I support mine by using a peg to hold the open sides of the pages together as shown below.


Once completely dry, glue the two pieces of fabric to either side of the spine area. Take care to avoid adding glue to the actual spine; you want this to remain un-attached from the cover in order to allow the stitched pages to open properly when the book is completed.


With the fabric secure on either side of the spine you can either glue down the outer pages onto the covers or add an extra piece of folded paper/fabric on each side to stabilise the stitched signatures (these are called end pages). I repeated this process on both sides of the Card Case to attach both sets of pages.


Now it's time to take a proper look inside at some of the pages which feature Eileen's dies, stamps and embossing folders.


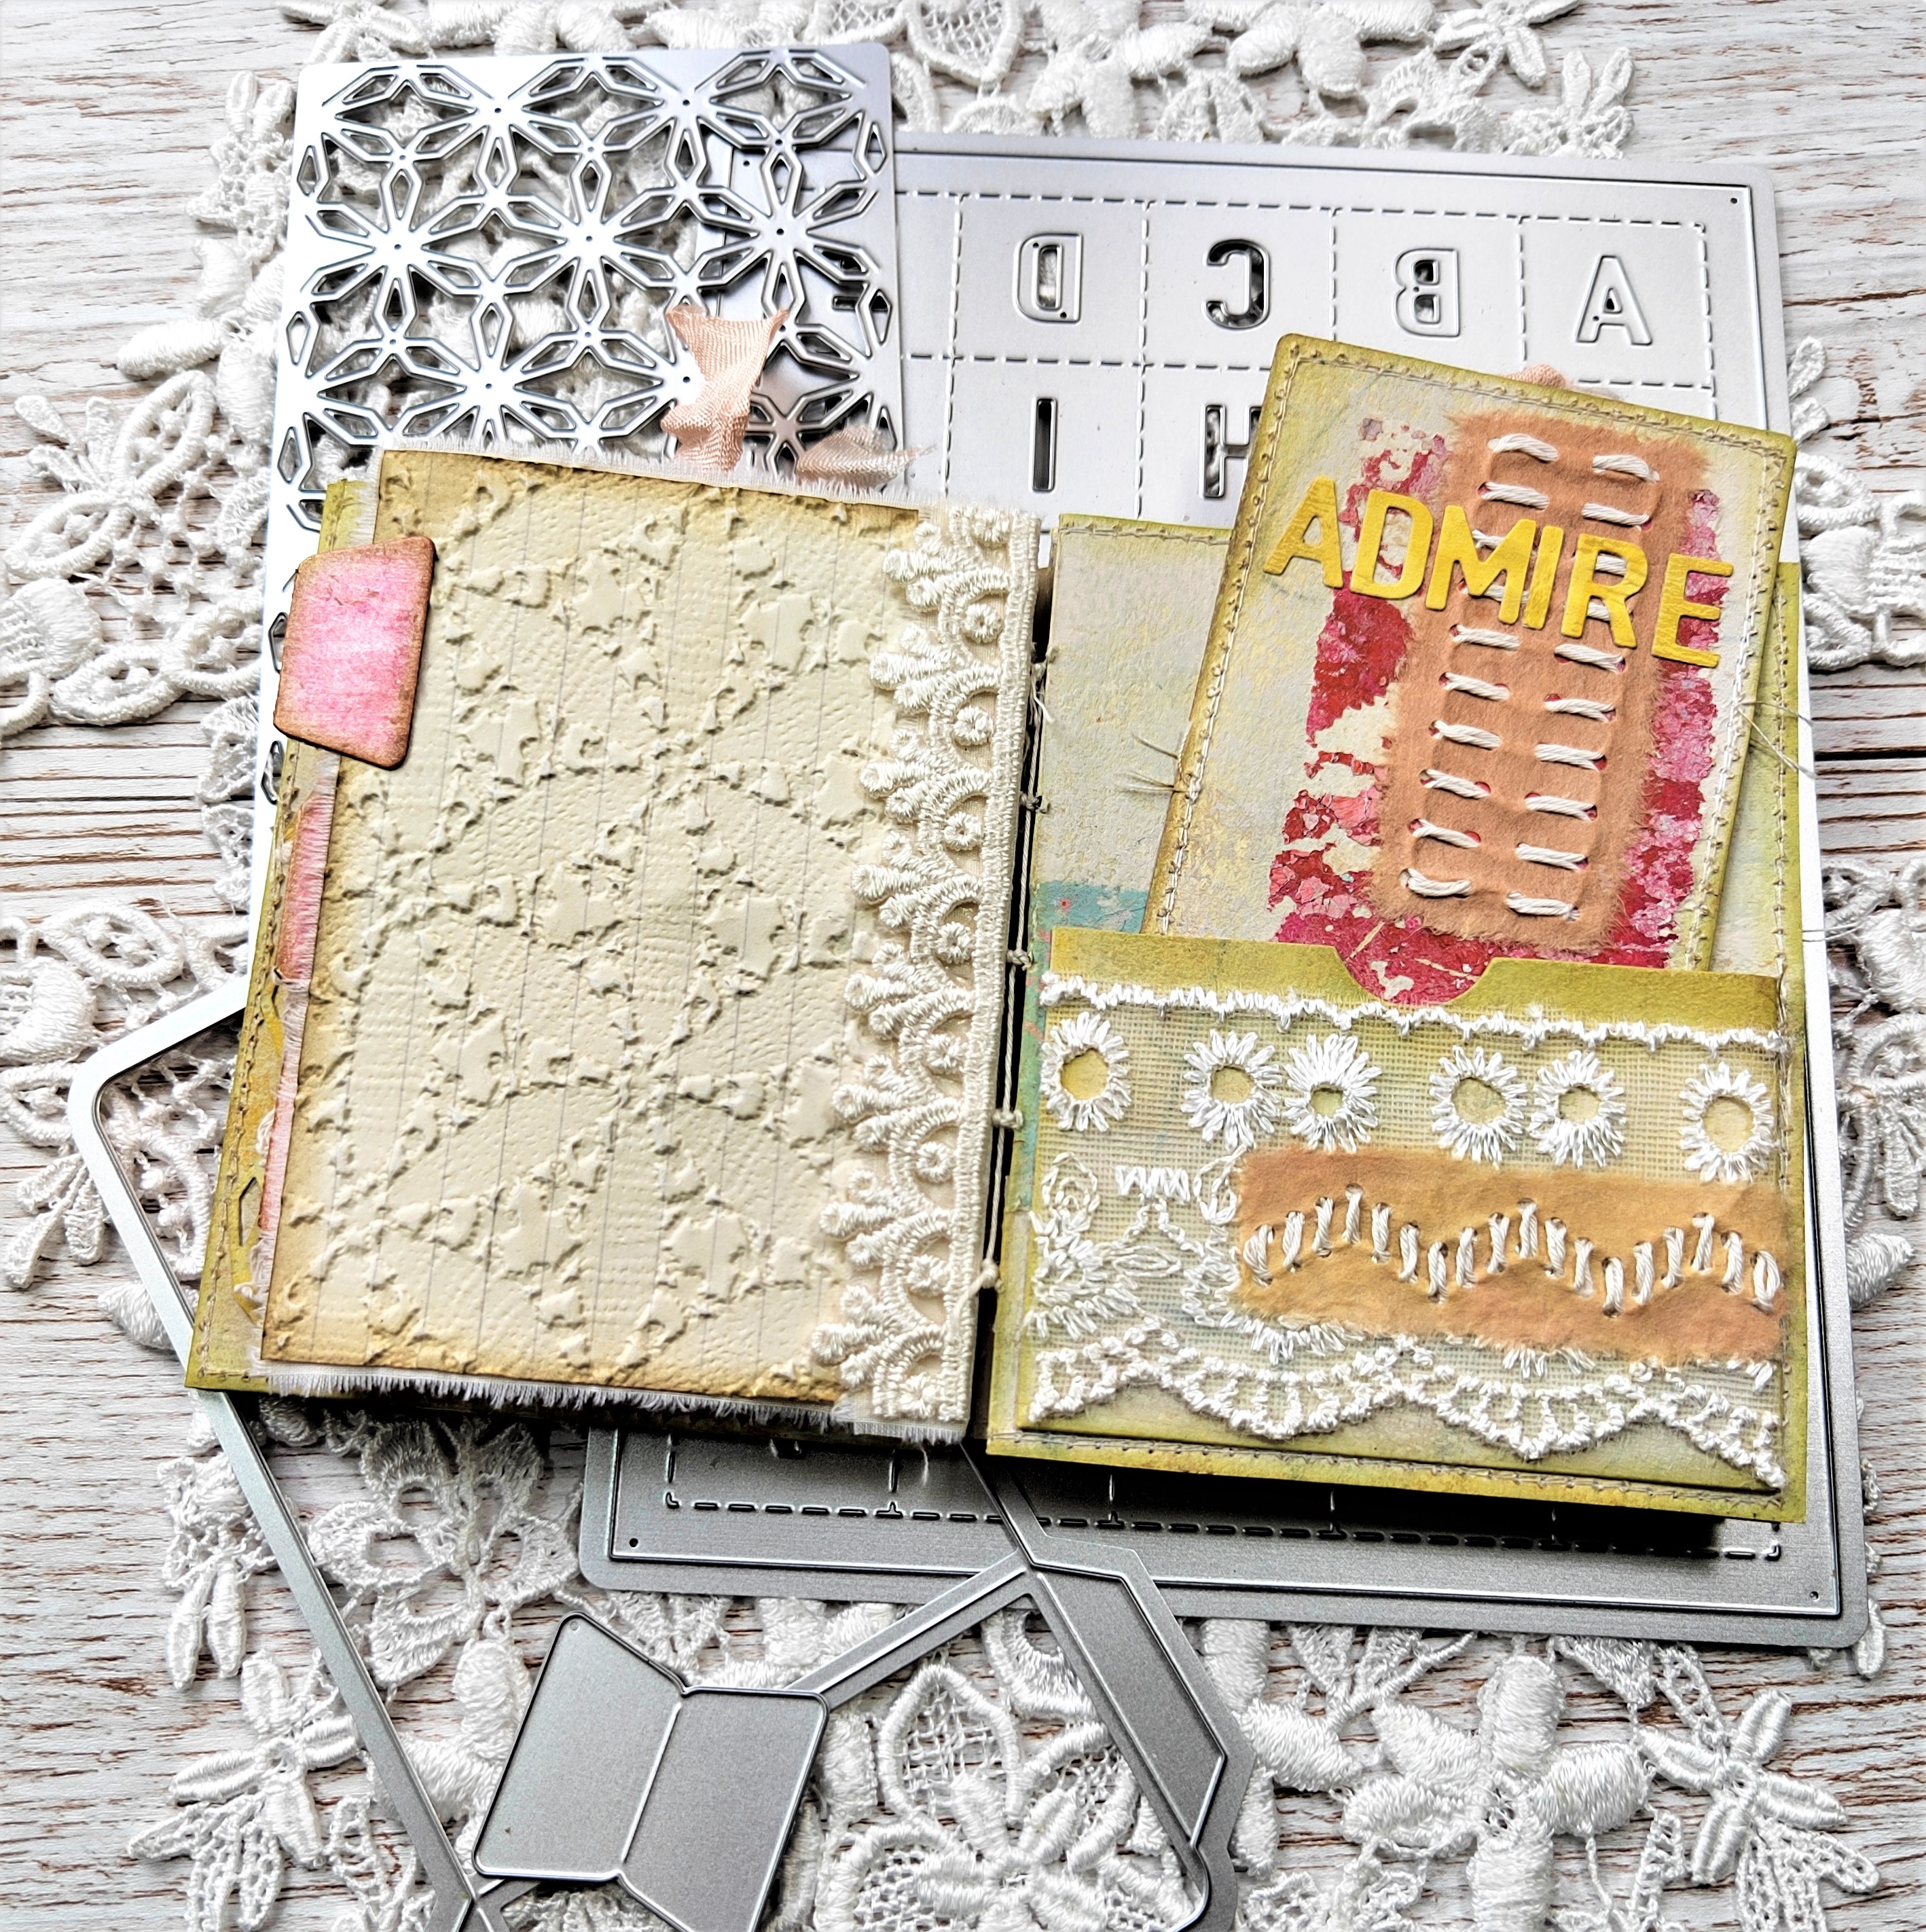
Here's the new Envelope and Journaling Card with a button from the Card Case die and lettering from the Tile Alphanumeric Die. The page opposite is embossed with the Tablecloth 3D embossing folder.


That button from the Card Case die is incredibly useful for adding to Eileen's button cards. The tabs on the edges of some of the pages come from the the Journaling Card, Envelope & Windows die set.


Die cut postage stamp shapes come from the Mini Slimline & Tickets die set; they can be left plain or emboss them with the 3D Vintage Buttons embossing folder.


Thank you for joining me for today's flip through and tutorial. Make sure to check out all the fantastic projects and tutorials from the rest of Eileen's team members - links to their posts can be found on Eileen's blog throughout the month.

For now thanks for visiting,
Jenny xxx

3 April 2023

Eileen Hull Designs Sizzix Chapter 2 Release Party

Hi everyone and welcome. Thanks for joining the Eileen Hull Designs Chapter 2 2023 Release Party! This quarter the release will be special as Eileen will be broadcasting direct from the NAMTA trade show! Make sure to join her on the Eileen Hull Designs Facebook Page and YouTube channel to watch.

There's a giveaway too! Comment in the Facebook and YouTube livestreams and tell her which of Eileen's other dies would work well with this collection. You have until April 10 to post your comments. And of course watch Eileen's YouTube channel to see die assembly and project ideas.


The release this time is gorgeous and as always works beautifully with Eileen's previous releases so make sure you mix and match when playing! There are three dies in the set: the Card Case, Mini-Slimline & Tickets and Journaling Card, Envelope & Windows.

The Card Case is a Bigz XL ScoreBoards die. This die is specially designed to cut and score thick material up to 1/16" like matboard, chipboard, leather, felt and fabric so your finished project is nice and sturdy. The finished Card Case die measures 4 1/2" x 3 1/2" and has an adjustable spine that goes from 1/2" to 2 1/2". This is the perfect size journal to hold your 3" x 4" journaling cards, as well as other small items like wallet photos, ATCs and ephemera. There is a swing out flap on each side where you can add pockets or small insert books- you decide what combination you want to do. Make the spine thick or thin- your choice!

The Journaling Card, Envelope & Windows die has 6 pieces- an envelope, 3" x 4" Journaling Card, three window cutouts (use with envelope to remove and back with glassine like a window envelope) and a tab. The Envelope measures 4 1/2" x 3 1/2" and fits perfectly inside the Journal! Or use it by itself and add your favorite ephemera pieces.

The Mini-Slimline & Tickets die design is similar to the Snail Mail die, which was very popular for creating faux postage stamps. There are four dies in the set- one is the size of a mini slimline card and one is a mat that may be placed behind the perforated piece. The other two pieces are a row of tickers and mat that goes behind that. When you fold over each perforated piece and tear it, it creates individual faux postage stamps and tickets! Die cut the piece from patterned paper for an amazing background- just add a sentiment and let the paper do the work.


My first project with this collection is a big one, using all three of the new releases, some previous releases and a mix of textures and artwork to create an art journal celebrating one of my favourite places, travels in Venice, Italy. For now here's a look at the front cover;


The colours are soft pastel tones evocative of warm summer sunshine and Italian architecture. From the peek inside you'll see this is a double-sided folio style journal which wraps up together beautifully to make something that is easily transported in your bag or backpack. Imagine having a stash of plain watercolour paper inside all ready for you to draw, doodle, make notes and attach ephemera on you own travels!


I will be back to share more detail of the pages inside but in the meantime here's a video flip through;


I hope you've enjoyed seeing my first project using Eileen's latest die releases. Make sure to tune in to head on over to Eileen's website to see more from the rest of Eileen's team.

You can also blog hop on these stops;
Eileen Hull Designs
Pam Bray
Jennie Atkinson
Sarah Lizzie
Lisa Hoel
Susie Bentz
Tonya Trantham
Jenny Marples
Maggi Harding
Karen Bearse
Sue Eldred
Sharon Curtis
Teresita Arvelo
Madeline Arendt
Cheryl Bodkin-Waters

For now, thanks for visiting,
Jenny xxx

28 March 2023

Topflight Stamps 6th Annual Birthday Blog Hop

Hi everyone and welcome. It's Topflight Stamps 6th birthday and to celebrate, they’ve teamed up with some great designers to showcase celebratory projects using the unique products available at Topflight Stamps. Please hop along with us and see all the beautiful talent from this group of amazing designers! (List of Hop Stops available at the end of this post and on the Topflight Stamps blog HERE). They are also Hopping on Instagram! You can start at the Topflight Stamps account @topflightstamps


GIVEAWAY DETAILS

Of course, it wouldn’t be a birthday celebration without prizes! Topflight Stamps is giving four lucky winners $50 Gift Certificates to the store. Two winners will be chosen from commenters on the blog hop and two will be chosen from commenters on the IG hop. For a chance to win, make sure to visit the stops on the hop and leave a comment by April 1st. Winners will be announced on the Topflight Stamps blog on Monday, April 3rd. U.S.A winners only due to shipping issues. Good Luck!

For my project I decided to keep it simple and made a card, opting to leave it open enough to celebrate a birthday but also maybe to celebrate a special person just because.


I've used gel plate prints to create the background, the PaperArtsy stamp set EKC64 by Kay Carley to stamp the flowers and sentiment on top, and PaperArtsy Fresco Finish Chalk Acrylic Paints in Vanilla, Pumpkin Soup, Amethyst, and Granny Smith to add colour to the flowers. The new PaperArtsy Mini stencil PM023 has been used to add perforation dots to the background with Snowflake PaperArtsy Fresco Finish Chalk Acrylic Paint and I've used the Vanilla colour to paint the layer beneath the main panel. 

Don't miss the sale also going on over at Topflight Stamps! There is a wide selection of fab stamps and products sourced from all over the world. And make sure to enter the giveaway to be in with a chance to win!

For now thanks for visiting,
Jenny

Blop Hop Stops;


Kathi Rerek
Dina Kowal
Esther Asbury
Annette Allen
Rachel Kleinman
Connie Mercer
Lisa Hoel
Jenny Marples
Cornelia Wenokor
Ericka Strange
Melina Dahl
Autumn Clark
Maria Willis
Angela Myhre
Gwen Lafleur
Natasha Vacca
Colleen Balija
Alanna Moses

15 March 2023

Wordsoup, Tags & Pockets for Eileen Hull Designs

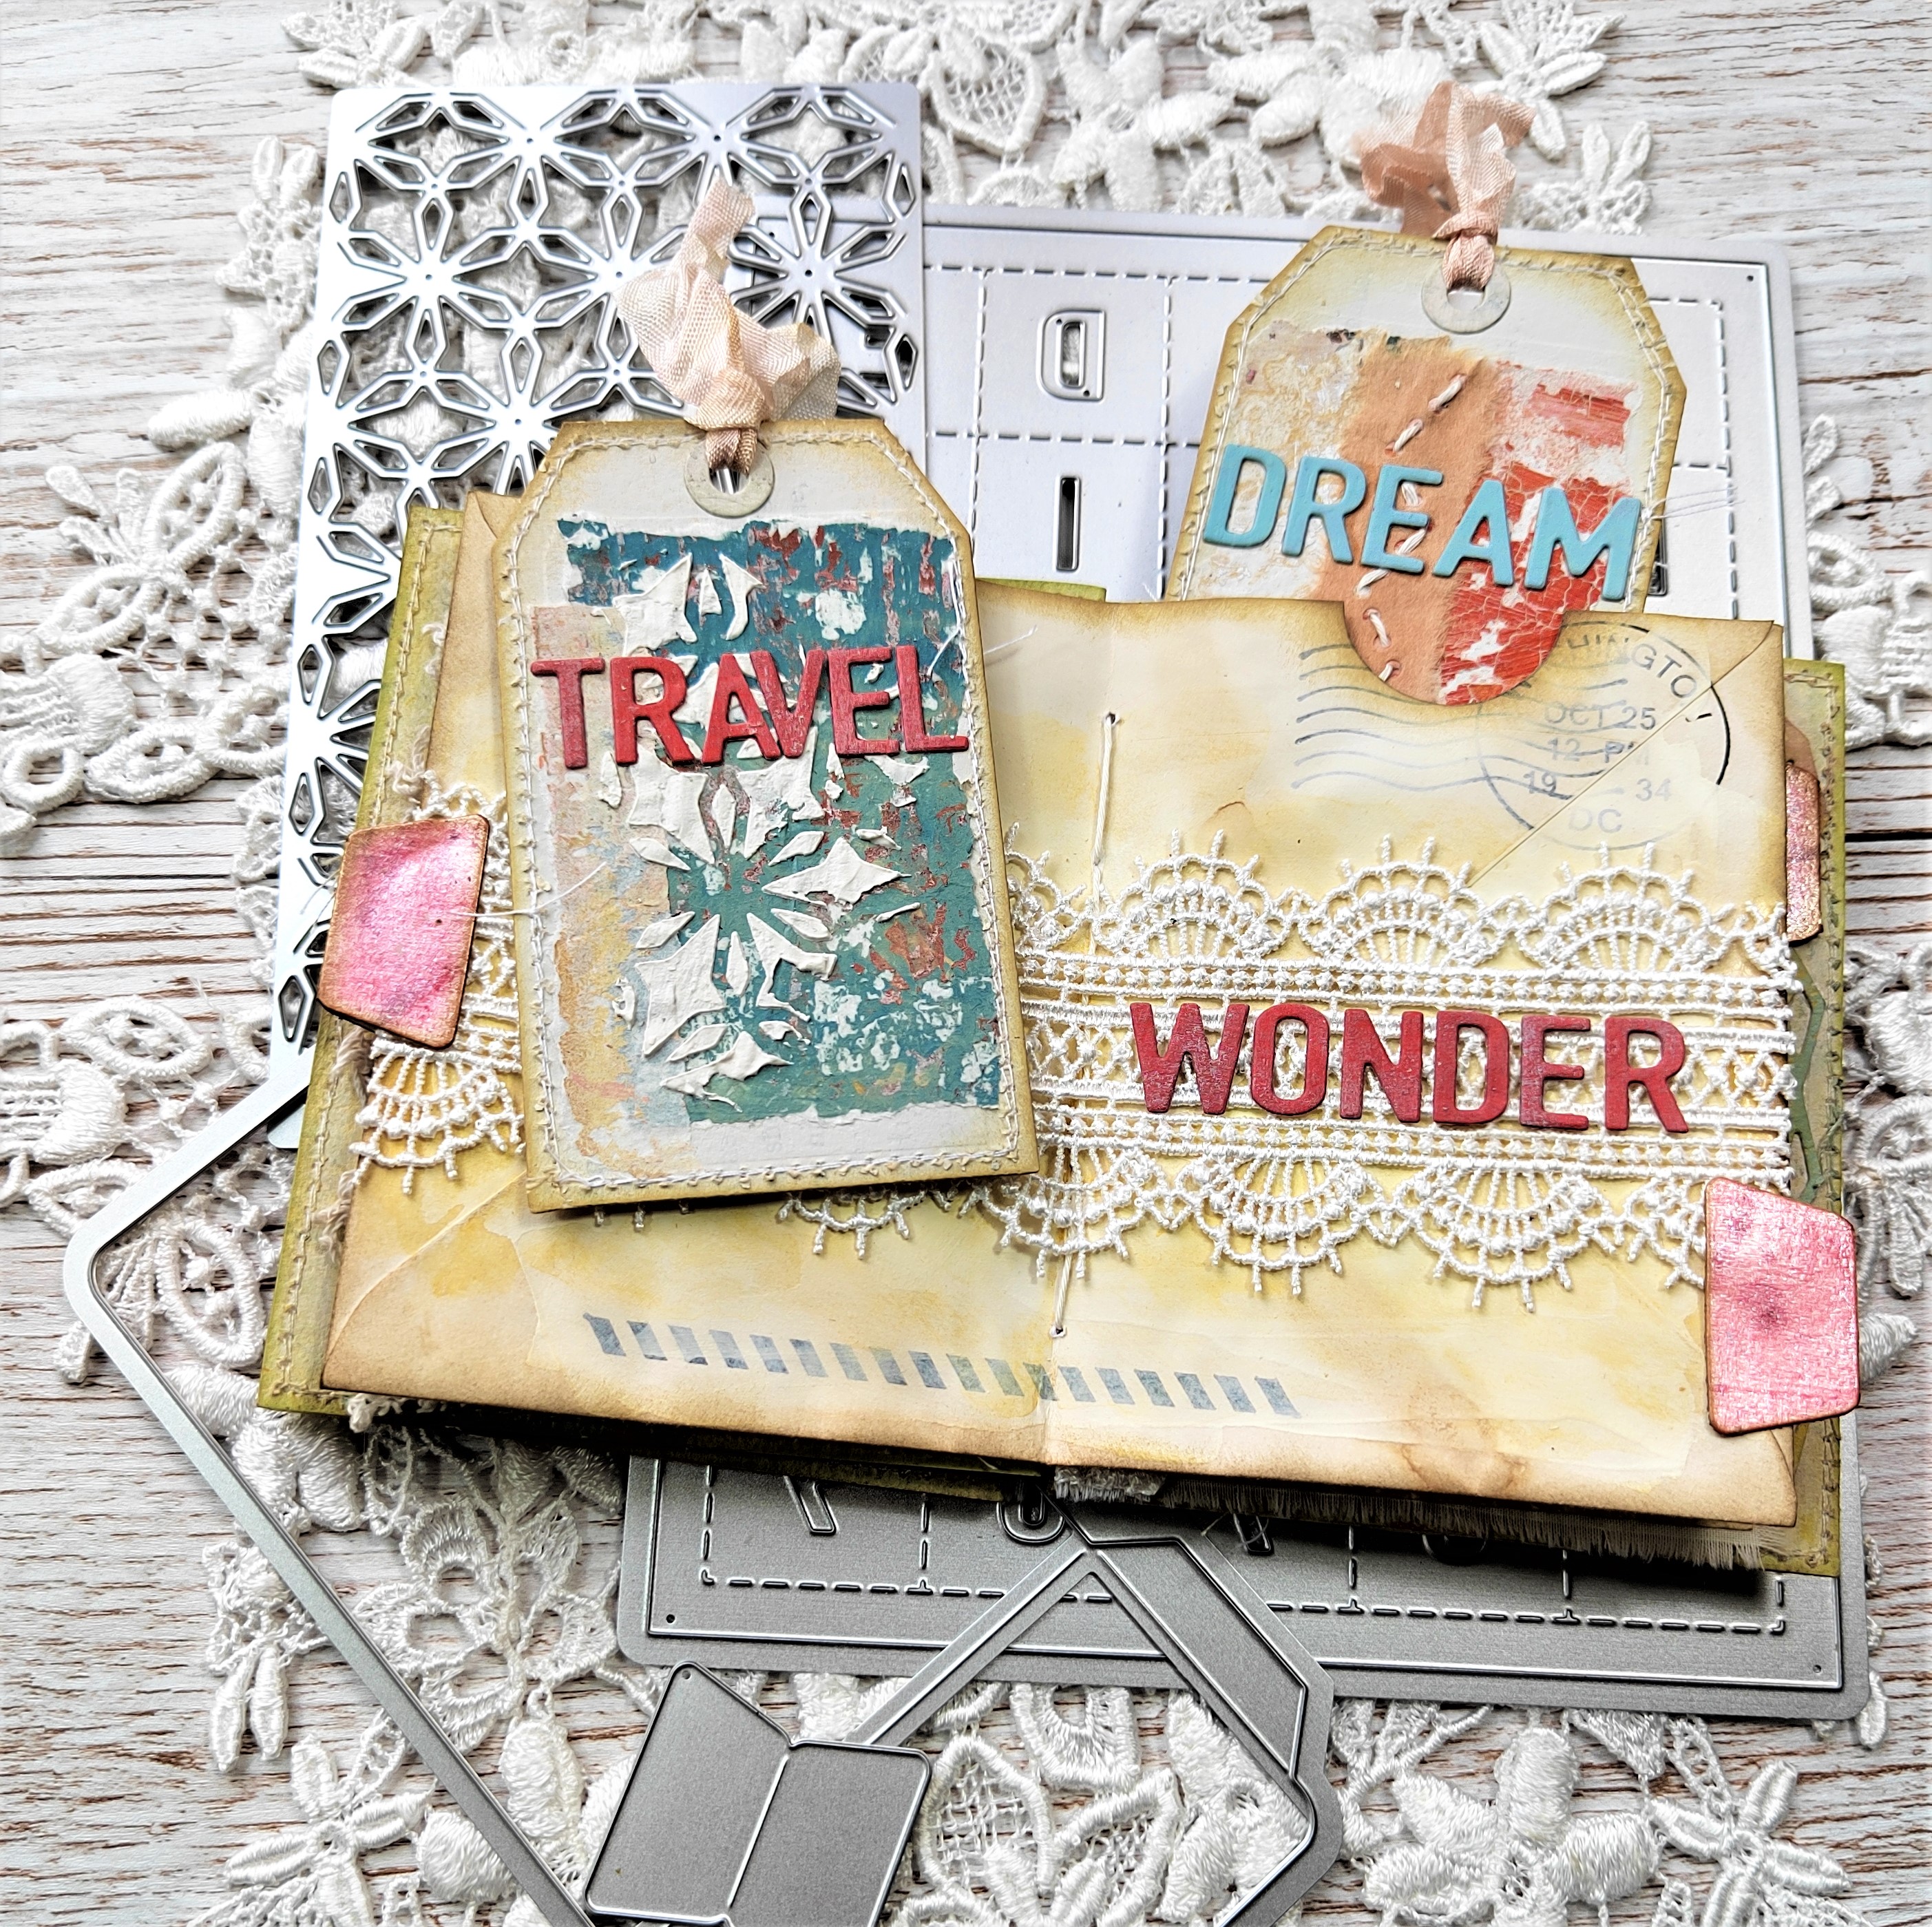
Hi everyone and welcome. This month Wordsoup, Tags & Pockets” is the new March theme for Eileen Hull's teams. Words and letters are being used in projects that also combine the new Chapter 1 and older dies of Eileen’s. I've created a collection of tags, cards and pockets that will go inside something that will be revealed in all its glory next month!


There's lots of texture included on all of these interactive elements; I've done a lot of stencilling through a die cut panel using Eileen's Sizzix Thinlits 'Skinny Mini Elements' Die.


The pocket panel, the page tabs and some of the little ATC cards have been die cut using Eileen's Sizzix Thinlits 'Library Pocket, ATC Card & Tab' Die Set.


The tags were die cut using the medium size tag from Eileen's Sizzix Thinlits 'Card, Waterfall & Tags' Die Set.


Of course the words were made from Eileen's Sizzix Thinlits 'Tiled Alphanumeric' Die.


Throughout the pages I've also included lots of hand stitching, in particular using some of Eileen's long since retired die designs (proof as if it were needed that Eileen's dies will last you a lifetime of creativity!)


I'm looking forward to sharing the completed project with you next month as part of the upcoming Chapter 2 release party. In the meantime thank you for joining me today and make sure to check out all the fantastic projects and tutorials from the rest of Eileen's team members - links to their posts can be found on Eileen's blog throughout the month.

For now thanks for visiting,
Jenny xxx
Related Posts Plugin for WordPress, Blogger...