Hi everyone and welcome. Throughout April Eileen Hull's teams are continuing to share projects made using the new Sizzix Chapter 2 collection. To recap, there are three dies in the set: the Card Case, Mini Slimline & Tickets and Journaling Card, Envelope & Windows.
At the beginning of the month Eileen hosted a Release Party during which I shared a peek at a new Art Journal created using all of the new dies (and more besides!) Today I'm back to show you more of the pages inside, but before all that a quick update on how they were bound together and inserted.
The covers of the Card Case open in a folio style so I decided to add the pages by stitching them together with Coptic Stitching before securing them inside each cover with fabric. Treat each side as though it is a separate book like this;
During Eileen's Live I was asked how I bound in the pages so here are some photos from an older tutorial of mine. I start by making holes in the centre of each folded page (or in the case of the envelopes in the centre of the main fold before they are glued together at the sides). Make an odd number of holes - more holes give more stability.
Next, complete the Coptic Stitching using a strong thread - there are loads of video tutorials on YouTube showing this which I highly recommend as the easiest way to learn.
Once stitched together add bookbinding glue or PVA glue over the edges of the stitched pages and stick onto a piece of thin fabric, taking care not to glue the sides of the end pages to the fabric. I support mine by using a peg to hold the open sides of the pages together as shown below.
Once completely dry, glue the two pieces of fabric to either side of the spine area. Take care to avoid adding glue to the actual spine; you want this to remain un-attached from the cover in order to allow the stitched pages to open properly when the book is completed.
With the fabric secure on either side of the spine you can either glue down the outer pages onto the covers or add an extra piece of folded paper/fabric on each side to stabilise the stitched signatures (these are called end pages). I repeated this process on both sides of the Card Case to attach both sets of pages.
Now it's time to take a proper look inside at some of the pages which feature Eileen's dies, stamps and embossing folders.
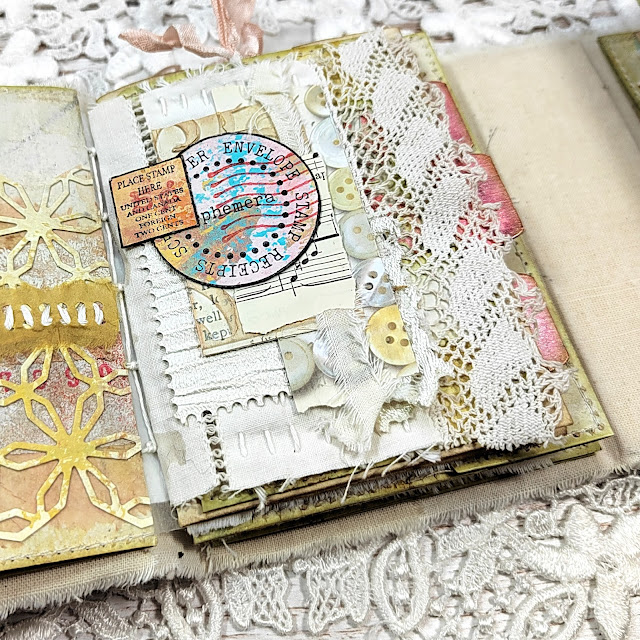
Here's the new Envelope and Journaling Card with a button from the Card Case die and lettering from the Tile Alphanumeric Die. The page opposite is embossed with the Tablecloth 3D embossing folder.
That button from the Card Case die is incredibly useful for adding to Eileen's button cards. The tabs on the edges of some of the pages come from the the Journaling Card, Envelope & Windows die set.
Die cut postage stamp shapes come from the Mini Slimline & Tickets die set; they can be left plain or emboss them with the 3D Vintage Buttons embossing folder.
Thank you for joining me for today's flip through and tutorial. Make sure to check out all the fantastic projects and tutorials from the rest of Eileen's team members - links to their posts can be found on Eileen's blog throughout the month.
For now thanks for visiting,
Jenny xxx


I love this so much! I cannot wait to try it!
ReplyDeleteLove it, so many pretty uses of Eileen's dies. Especially love the tabs & envelopes!
ReplyDelete