Since the launch I've had a number of requests to share how this was constructed so here's an in depth tutorial, starting with the pages.
You will need a collection of 12x12 inch double-sided scrapbook papers and some matching ephemera; I picked some from 49 and Market's 'Vintage Artistry' collection. Taking 10 sheets cut them lengthwise through the middle to create 20 pages measuring 6x12 inches. I scuffed the edges of the card and machine stitched around each page for added detail and texture.
With ten of the pages score at 4 3/4 inches and at 9 inches, leaving a 3 inch flap at the end. You can leave the 3 inch flaps loose, cut off 1 1/2 inches width-wise and glue down at the top and bottom to create tuck spot pockets or cut of the top 4 inches and glue down the remaining 2 inches at the bottom to create a pocket.
With the other ten pages score at 4 3/4 inches and cut off 2 3/4 inches at the other end to leave a 4 1/2 inch page. Use the cut offs to create pockets and belly bands as well as reserving some to make extra ephemera with Eileen's dies and stamps.
Decide on the order of your pages making sure to mix up the colours, page sizes and types of page sitting next to each other. Once sorted make small holes along the central fold of each page at 1/2 inch, 1 1/4 inches, 3 inches, 4 1/4 inches and 5 1/2 inches. It is worth using a punch board or template for this to make it quicker and more consistent.
Stitch the pages together using a Coptic stitch binding to create a text block from your pages. I use a method demonstrated by Sea Lemon on her YouTube video HERE.
This text block needs to be self-supporting because it will not be glued onto the centre of the spine so to keep it in place but still flexible glue a strip of fabric slightly wider and shorter than the spine in place using an archival acid free glue. Hold the text block in place and upright by securing it with an elastic band at the edge of the pages as shown below.
Whilst the glue is drying you can work on your spine. To make it more flexible I cut off the half inch outer strips along the score lines and re-attach with an 1/8 inch gap using Architape®.
You can see below how I've attached the second side back onto the main spine using Hinge Spacers to ensure an even gap between the two pieces of card. Stick the Architape® along the outside of the spine before wrapping around onto the inside of the spine to ensure it is secure.
Here's what the spine will look like when the tape and gaps have been added on both sides. The reason for doing this rather than leaving the die cut spine solid (with inbuilt score lines) is that it becomes more flexible and allows the pages to lay more flat when opened.
At this stage decorate your spine with trims, tassels etc before you stick the spine, text block and covers together.
Add glue to the outside 1/2 inch strips on the spine only (the bits separated from the main spine by the tape). Do not add glue to the main portion of the spine. Sit the text block, now secured with the fabric strip, onto the spine in place. You should find there will be a 1/4 inch gap at the top and bottom. Press the fabric and outer pages into the glue and leave as shown below until completely dry.
When dry you can fold the text block shut with the spine now securely wrapped around it and glued in place. Now add colour with paints or inks onto the two die cut cover pieces before gluing them onto the spine on the outer 1/2 inch strips.
Use some of the leftover paper and ephemera to decorate the front and back covers, making sure to glue ribbon beneath the paper layers if you want to use it as a closure. I used Eileen's new Sizzix 3D 'Vintage Buttons' Embossing Folder as a great way to add decoration and dimension to one of the layers, whilst applying Glossy Accents over the more delicate images helped to ensure they wouldn't get damaged each time the book is opened.
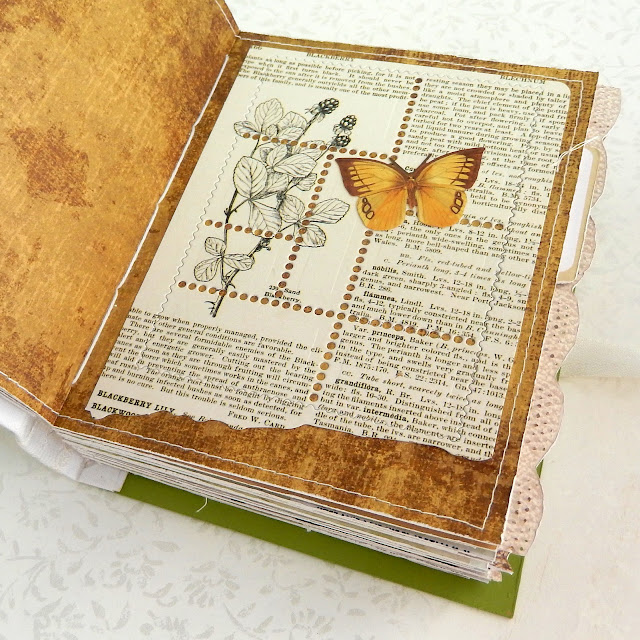
Here's a closer look at some of the pages inside the book where I've more of Eileen dies (including her new Sizzix Thinlits 'Snail Mail' Die) and some of her stamps to create interactive elements and ephemera. The rest of the ephemera, including the paper lace and tabs, came as part of the Vintage Artistry collection;
I hope you've found this tutorial helpful - if you have any questions please leave them in the comments below and I will do my best to answer them.
Make sure to check out the new release projects and tutorials from the other Inspiration and Educator Team members - links to their posts can be found on Eileen's blog throughout the month.
For now thanks for visiting,
Jenny xxx


Wow! That is just amazing - such a lot of work!
ReplyDeleteAbsolutely fabulous! I'm going to try binding it like this too! Thanks for the excellent instructions Jenny. =)
ReplyDeleteOMG Jenny. Wow- another collector's item! This is breathtaking...
ReplyDeleteit is! i do not have words! AWESOME!
DeleteI want to come over to England. Sit in your house while we have a few drinks, turn the pages on your stunning books, while we laugh & laugh. Yup that is what I want!!!
ReplyDelete