Hi everyone and welcome. This month Eileen Hull's Teams are sharing projects made using unconventional materials in combination with her Sizzix Scoreboards and Thinlits dies. Inspired by an idea that originated from one of the Fan Club members (I can't remember who so if someone does please let me know!) during one of Eileen's FB live sessions I combined the Sizzix Scoreboards '
Pocket Notebook' XL Die with the new Sizzix Thinlits '
Bookbinding & Label' Die Set and something unconventional to make this book with a flexible spine.
Below you can see the flexible spine and take a first look at the unconventional item I used for creating it - yep, coffee stirrers are not just for your takeaway beverages it turns out! In this post I'll be taking you through how to construct the book structure and give you some ideas for things you can include inside using your Eileen Hull Designs dies.
As part of the process of creating the cover and pages inside I also used several of Lynne Perrella's stamp sets in combination with Fresco Finish paints, all from PaperArtsy. To see more of the pages and descriptions on how they were created please head over to the
PaperArtsy blog here to see the companion post.
Time to find out how to create this notebook, starting with the basic materials needed; as mentioned before I used those thin wooden coffee stirrers that come with takeaway coffee along with some corrugated card, lace and some basic card stock. To begin with the covers were cut using Eileen's Sizzix Scoreboard 'Pocket Notebook' Die from strips of corrugated card that were 4 1/2 inches (11.5cm) wide. I went on to tear away small pieces of the top layer of the card along some of the edges, remembering not to go too far and weaken the covers too much.
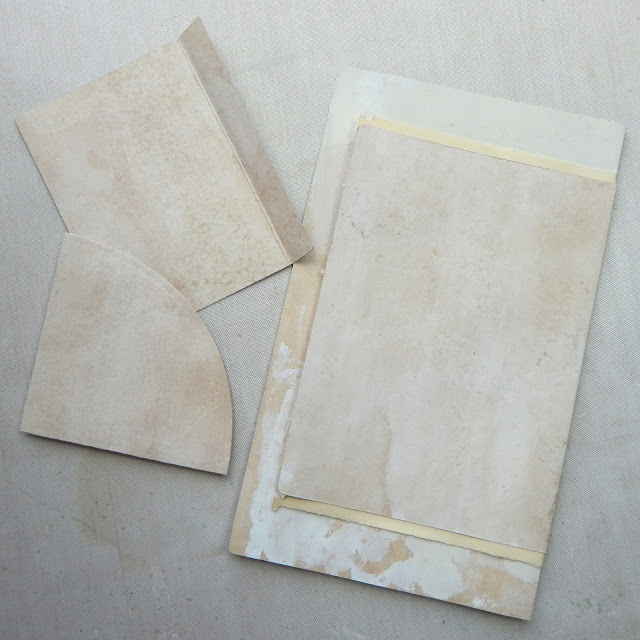
Next up I used Eileen's 'Bookbinding' Thinlits Die to cut the hinge system from tea stained cartridge paper. Before gluing together the three central 'mountain' sections I cut the panel in half widthways as shown below.
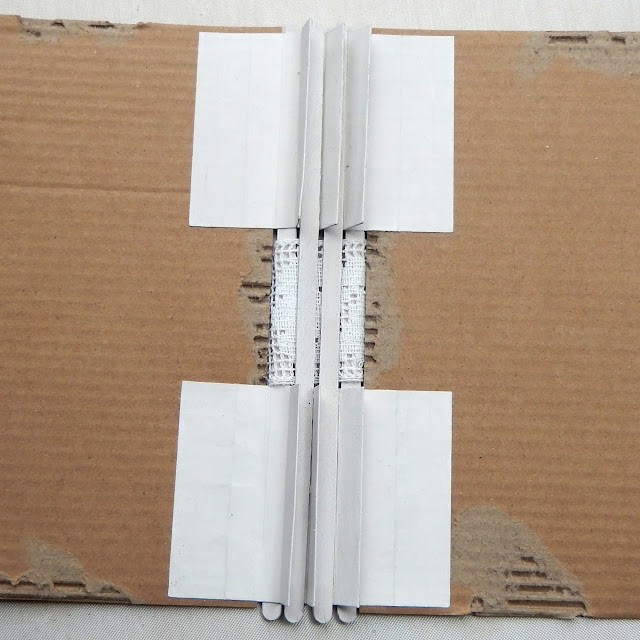
Now to start the hinge assembly; you can see below where I glued one side of each of the bookbinding pieces to the front cover up to and including the first side of the first 'mountain' fold. This leaves a gap roughly 1 3/4 inches (4.5cm) wide in the middle into which a strip of lace about 20 inches (51cm) long is inserted.
You can see below how the lace become secured in place by the first of the coffee stirrers, glued onto the first of the flat 'valley' section on the right side of the cover.
Flipping the cover back to the inside view I then stuck two further stirrers onto the middle two flat 'valley' sections of the hinge.
Returning to the outside of the cover the fourth and final stirrer was glued onto the underside of the fourth flat 'valley' section as shown below.
Back over to the inside of the book and you can see below how I finished the hinge by gluing the final two end sections onto the back cover, mirroring the attachment on the front cover. This traps the lace in place on the outside of the book but should still be loose enough that the lace can be moved about if needed when moving on to the decoration stage.
After giving the card a coat of gesso it was ready to decorate with paints. I also cut six pages measuring 4 inches (10cm) wide by 6 3/4 inches (17cm) long to fit either side of each of the three hinges inside the book using the page section on the Pocket Notebook die. It turned out I ended up only needing three of the pages.
That's because I cut a further three double pages from tea stained paper, stencilled using a Sara Naumann stencil and covered with a sweep of PaperArtsy Grunge Paste. You'll see below how I folded the paper in half before cutting the pages.
To add to the 'page real estate' and create more interest through the book I decided to add smaller pages by folding them on one side and gluing them onto the back of each of the pages. The idea was that those folds would be hidden when the back of the pages were stuck onto the hinge parts and glued together back to back (this is shown later in the post).
Here are some ideas for other pages/interactive elements you could inside a book, all cut from tea stained paper; these include envelopes made from the 'Tiny Book Case' Die, one side of the 'Gift Box' Die and the 'Gift Card Folder & Label' Die.
Smaller pages can be cut using the 'Notebook' Die and I used the 'Card Box' to create a large pocket for one of the full size pages.
Using a couple of the newest of Eileen's dies I created a small page using the Waterfall page from the '
Card Waterfall & Tags' Die Set and a corner pocket from the '
Folio Page Pocket & Flowers' Die Set. Below you can see how one of the smaller pages looks when attached to one of the large pages with the hinge hidden at the back.
With the pages decorated (for this part make sure to see my tutorial post over on the
PaperArtsy blog here) I began to attach the main pages to the hinge sections. Below you can see where I've glued the back of one of the large single pages to the front of the first hinge section. I then stuck one side of the folded pages on top of this, sandwiching the second side of the hinge piece in between. The same process was then repeated for the second and third hinge pieces; a single sided page on the front and a folded page on the back, each with their smaller pages already secured onto them at the reverse (hidden) side. In this way you end up with three large pages, three folded pages and six smaller pages, giving you plenty of 'real estate' to decorate.

Below you can see how I began the process of decorating the covers, going with a Spring birds and postage them using muted vintage colours. The large bird on the front is a Rebekah Meier design, whilst the rest of the stamps and stencils used throughout the book are Lynne Perrella and Sara Naumann designs from PaperArtsy.
Turning to some of the completed pages you can see here where the Tiny Book Case has been used to create a small envelope; notice how a slit has been cut into which the point of the envelope slots, cut using the smallest of the slit dies from the 'Card Waterfall & Tags' Die Set.
Below you can see the other envelope pocket cut with the 'Gift Card Folder' die holds one of Eileen's new tags and a stamped image from Lynne Perrella's stamp set LPC048.
Here are the inside pages of one of the folded pages, stencilled with a Sara Naumann stencil PS219, hand stitched with an interlocking leaf pattern and with a pop of colour applied using some gel plate printed tissue.
The lace side pocket below has a Gift Card holder, cut with Eileen's die from tea stained paper, tucked inside.
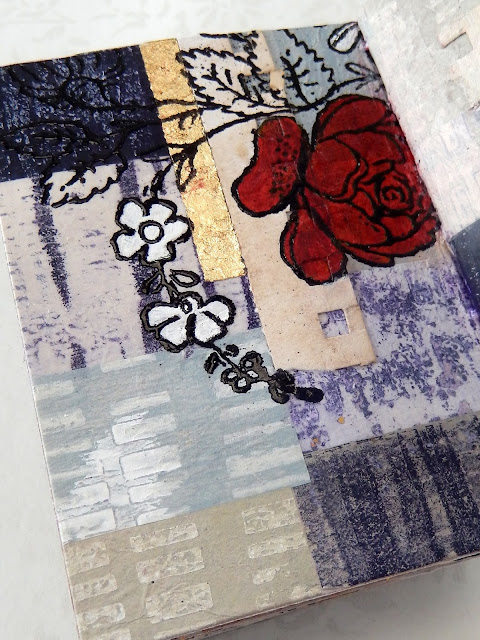
The 'Card Folder' large pocket is covered with calico fabric and one of the quarter circle pockets from the 'Folio Page Pocket' Die Set sits on top holding another of Eileen's new tags. In the background you can see more of the stamping, this time using images from Lynne Perrella's stamp set LPC045 which have been heat embossed and covered with dilute layers of Fresco Finish paint.
Finally back to the cover of the finished book which has a very tactile feel to it.
I hope you've enjoyed seeing how Eileen's dies have been used to create this notebook. Make sure to check out the projects and tutorials using unconventional materials from the other Inspiration and Educator Team members - links to their posts can be found on
Eileen's blog throughout the month. And remember to check out the companion post for this notebook over on the
PaperArtsy blog, showing more of the decorated pages.
For now thanks for visiting,
Jenny xxx


