Before beginning it's important to say I was inspired to create this by a project guide found on the website A Delightsome Life. I started with a piece of ticking fabric roughly 15 inches long by 7 1/2 inches tall. Folding it width-wise with the right sides together I machine stitched along the short edges to create a cylinder shape. Then using strong thread I did a running stitch about 1/2 inch from one end, gathering it together and tying in a knot firmly. Turning the stitching to the inside of the cylinder I filled it with some flame-resistant toy stuffing before doing a running stitch around the un-closed edge. Pulling the thread firmly and knotting you now have a cylinder knotted at each end.
Using an embroidery needle with a large eye I threaded twine through from the bottom to the top of the cylinder. Pulling the thread round I knotted the two ends together, pulling to create a crease in one side of the cylinder. By repeating this process with the same piece of thread five more times, in through the bottom and out through the top, I ended up with the basic pumpkin shape. The twine was secured with a final knot at the top.
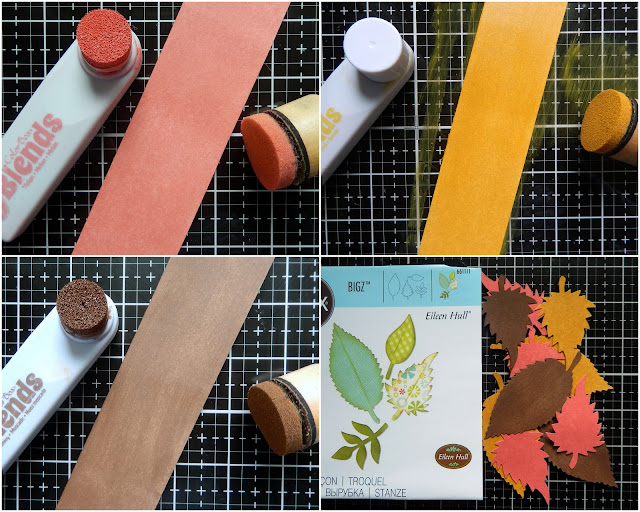
Cutting three strips of thick white paper 1 3/4 inch wide by 12 inch long I coloured each one with Eileen's Colorbox Blends inks. To get a lovely streak free finish I pressed the ink nozzle firmly onto my media mat, releasing a puddle of ink and then used a mini blending tool to add the ink to the strips on both sides. The colours used were Melon, Golden and Nutmeg, all of which worked well with the ticking fabric. I then cut a mix of the two largest leaves using the Spring Leaves Bigz Die (10 leaves in total - 4 large, 6 slightly smaller).
I shaped each of the leaves on the underside and used the remaining Nutmeg ink left on my blending tool on the edges of them. After using a hot glue gun to fix a piece of twig into the centre of one end of the pumpkin I then arranged and attached the leaves around it. To finish I used the Twist & Style Tool to create coils of copper wire that were shaped into tendrils on the end of a paintbrush, again attaching them to the twig with the hot glue gun. Having completed this one, I would recommend adding the first layer of leaves, then the tendrils and finally the second layer of leaves trimmed at the base to fit so you can disguise the glue in the centre.
Here are some close ups so you can see how it all came together;
That's it from me but there's lots more seasonal inspiration from the team over on Eileen Hull's website so do make sure to check it all out.
For now take care of yourselves and get creative!
Jenny xxx


Wonderful autumn project Jenny! Love this - could translate into an apple or orange depending on what occasion there is.
ReplyDeleteWhat a fun project Jenny- love how you mixed it up! Amazing how many ways our basic tools can be used to make a range of projects including home decor! The twig stick is cool and so are the tendrils and inked leaves.
ReplyDeleteWhat an awesome project, Jenny. I love that the season’s colors are in the leaves! The wire and wood add a special touch...
ReplyDeleteA fabulous make Jenny, I love the twig and the tendrils! xx
ReplyDeleteLOVE LOVE LOVE...I want you to come make some with me! These are so precious Jenny!
ReplyDeleteI absolutely love that pumpkin. Now I want to make one!!! Thank you for sharing such an awesome project.
ReplyDelete