22 December 2012

Ho ho ho!!

That's what I imagine Santa would have said if he'd seen me at the bottom of the stairs in the wee hours of this morning!! Woke up in a blind panic that I'd left the outdoor lights on and went hairing downstairs in the dark - only our malamute insists on sleeping at the bottom of the stairs (we call her 13th step) so I knew I had to avoid her. Being one step higher than I thought I was and full of that rotten boomerang cold again an ungraceful swandive then occurred resulting in some large bruises (to my body and ego!!) It's a definite Hels story, which is thoroughly appropriate as my final post before Christmas includes my entry to her Sunday Stamper Holly challenge.


As ever the UK has no sunlight (plenty of rain if anyone wants some!!) so apologies for the artificial lighting.


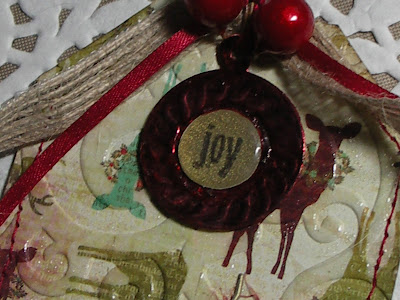
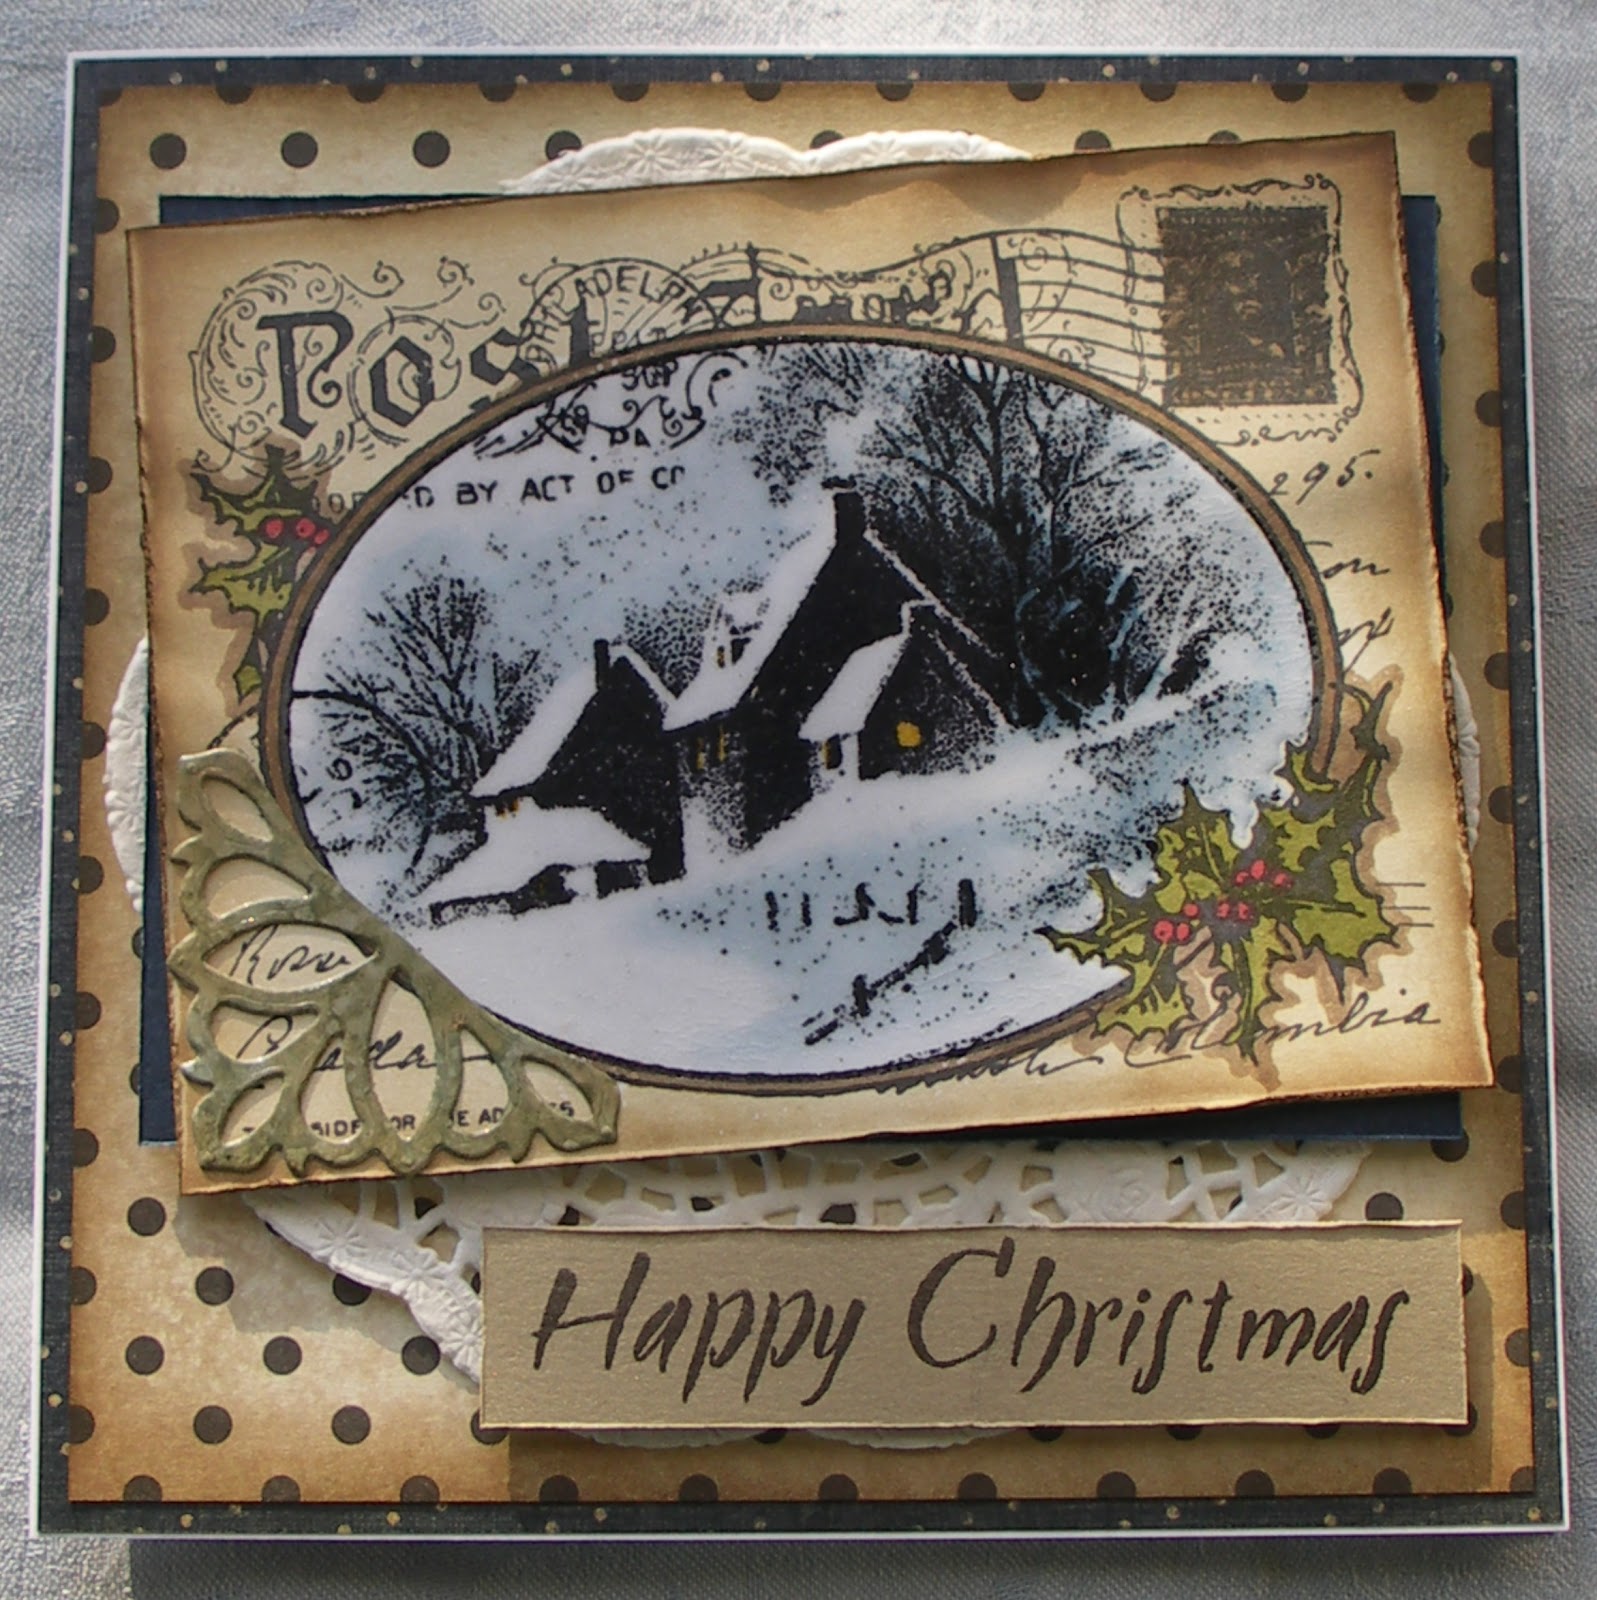
Elements for this include holly from my altered yellow card, another postcard image from the fabulous Astrid and some metal foil splurged with red pepper and oregano alcohol inks (sounds more like a pizza topping!)


That Basic Grey paper has worked well this year and it's been good to play with other tag tying options such as this fab glitter ribbon and some basic string lightly inked.


The background is quite subtle for me. The mustard Mulberry paper was way too strong so a touch of green pearl WOW embossing powder over DI Peeled Paint and a slosh of Picket Fence Stain/DI Walnut Stain edging made the world of difference.

I'm squeezing in one final challenge piece for Anything But A Card Challenge - Seasonal Holiday.


The central panel was made using Tim Holtz' alcohol ink resist technique (Compendium of Curiosities 2) and the whole bag used stamps from Creative Expressions.


Lots of Cosmic Shimmer mists were used on plain card and I used Sue Wilson's faux pearl idea too.


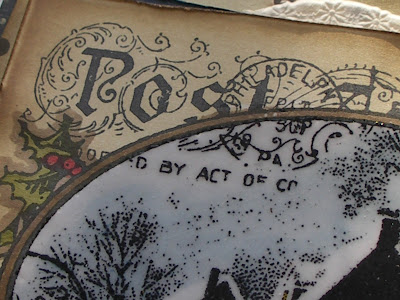
Have to say I am a fan of the detail you get when using WOW embossing powders.
Some quick heads up - Create and Craft are selling off a Ferro set for £10 and The Range have Papermania mini alphabet stamp sets for a huge £1!!!!
And finally (thank goodness I hear you cry) a huge thank you to everyone who has taken the time to follow me and leave comments since my debut 9 months ago. It has been a rollercoaster ride that is SO on the up next year, and you have been the best bunch of crafting friends a gal could have. Thank you from the bottom of my heart. I hope you have the best Christmas ever and the New Year brings everything you wish for.
Huge Christmasy hugs, Jenny xxx

20 December 2012

2 for 1 on Christmas cards...

Welcome all at this incredibly busy time of year. Don't know of anyone who is ready yet (mind you, I guess there are always things you could do extra and doesn't everyone overestimate how much they want to achieve/how much they can achieve?) Humble apologies for not joining WOYWW - helping to serve 250 Christmas dinners and then making 54 iced cupcakes sort of took up Wednesday but I intend to be in touch individually with all the wonderful friends I have made through this wonderful 'blog hop' over the coming day or so. Cardmaking has still been a part of life - just no time to post them 'til now, so there are two on this post (get a cuppa/mince pie/bar of chocolate/nice glass of something to keep off the chill to sustain you!)


It was made for my work colleagues and doubles as an entry for;
Moneysupermarket Christmas Card Craft Off


That's better. It was totally inspired by a midwinter card created by Linda Coughlin HERE. Layers included handmade paper on the base with embossed corners overstamped with VersaColor silver pigment ink, distressed Basic Grey Jovial text paper, net curtaining stamped with the pinecone image, and an embossed piece of paper from the same Basic Grey set highlighted with the same silver pigment ink.


Yep, that's a real blank postcard (found them whilst looking for something for a neice to record her grandma's baking recipes on - they work a treat). Obviously I Distress Inked this lovely Stampendous pinecone image/the pine needles background, and then dragged out some of the colour with water  to soften the whole thing.


You could say this is a 'chocolate box' card!? Final silver and purple ribbon flourishes completed the look.
And now, as promised/threatened, card no. 2.


I have several friends moving during this festive period, so this was an attempt to combine the two sentiments in one. One of them is the aforementioned Linda Coughlin who will hopefully be on her way to a new abode very soon. Linda, I hope everything runs smoothly and according to plan so you can really enjoy a fabulous Christmas and be prepared for the year ahead.


It came straight after the green tag (see previous post) as evidenced by the glittery paste masked texture background. See, it works on card/paper too. Using modelling paste has really added a whole new dimension to my crafting and I intend to play with this next year as I undertake the large ancesty project that's been churning around in my head for weeks.


Ranger Snowflake tinsel embossing powder used here on antique gold card which has been spritzed with red ink and embossed with Walnut Stain Distress embossing powder (love this stuff!)


My 'area for improvement' (don't you love education jargon!) is definitely alcohol inks. It took oodles of messing and layering to get this where I wanted it and there are some far more stunning examples out there (have you seen the work of Claudia at Von Pappe 2 - now there's a level of expertise to aim for).


The Crafty-emblies MDF fence and Woodware lock and key brads rounded the card off nicely.
Hurrah! You've made it (though I've no idea in what state!) Thank you so much for dropping by.
There will be one last post, but in case you are beyond busy may your Christmas be filled with wonder and warmth, and may you have the chance to spend time with cherised friends and family.
Huge Christmas hugs, Jenny xx

17 December 2012

And now I'm covered in glitter!!

Welcome one and all. The title of this post is an understatement - spurred on by an idea I saw at Lynne's wonderful website I attacked this tag and a card with modelling paste and glitter with great success. But I'm getting ahead of myself, and you want to see the tag (card next time, can't have you bogged down with a million photos at this busy time of year!)


The start of this story is a failed attempt at one of the 12 Tags of Christmas challenge which used Tim Holtz' faux suede technique from Compendium of Curiosities 2. This version used Peeled Paint and was way too dark. I didn't bin it, thankfully, in the vain hope that it could be rescued (distant rumble of hooves here as Lynne comes galloping to my rescue:)


How much difference did her idea make?! The paste even picked up some of the green mica colour along the way to make the whole thing blend more seamlessly. Oh, and you can use a heat gun on modelling paste if like me you are incredibly impatient/liable to stick your paws in anything remotely wet.


Now for my next source of inspiration - Rita had such a delicate vellum poinsettia on her friend's card the other day that it occurred to me that could work here too. The bottom layer was coloured on the reverse with more Peeled Paint and matching Stickles were used for the centre. I found by snipping around some of the leaves/petals it allowed the whole flower to get some dimension of its own.


Thankfully I still had a piece of jute from The Funkie Junkie Boutique which, when overlayed with some lace (courtesy of Trace, thanks hun x) trimmed the whole thing rather well. Hope this gives back a little of the inspiration I have received from so many others as we plough headlong towards December 25th.
Challenges for this one include;
Take care everyone, and thanks for coming to see my work. Hugs, Jenny x

14 December 2012

And sew another one

I want to start a brief post by thanking everyone for your amazing feedback. It has been very humbling to get so many positive reactions which have helped during those moments of huge self-doubt (which so many of us seem to have). I'm sharing a tag tonight (so apologies for the light quality) because there are deadlines looming and a large family gathering tomorrow will see me away from the laptop all day.


This will end up on a card, and thankfully I am nearing the end of making them. Don't get me wrong, I love Christmas but the theme is draining my creative juices a tad, and one thing's for sure - next year I will be investing in some appropriate dies because hand cutting everything is definitely time consuming.


The goals for this one were to use embossing to liven up some plain backing paper and to use sewing. Both ticked, but the jury's out on the little sewing machine you may have spied on Wednesday's post. It didn't like thick card, it was a pain to sort out the bobbins, and the machine didn't want to sew straight (and without wishing to blow my own trumpet I have been sewing for years, so it's not personal incompetance).


The reindeer was my first outing with Mulberry paper and embossing powder. Think I prefer it as a background technique, but at least it inspired the previous tag.


I always seem to do the top bit last. A diecut charm, some lovely twine ribbon from The Funkie Junkie Boutique and some holly berries from last year's crackers kept the whole thing slightly rustic.
Challenges list as follows;
Thanks for dropping by. I'll be catching up with you on a blog post/comment box soon. Hugs, Jenny x

Come in No. 12, your time is up...

Drum roll please, '*********' for my final '12 Tags of Christmas' tag.


This is a challenge set by Linda Coughlin, The Funkie Junkie, and is generously sponsored by The Funkie Junkie Boutique. Each week Linda has created a gem of a tag to inspire us and a whole host of talented peeps have played along to create some fab projects.


Linda's red/gold background inspired me for this one and I stumbled on a fab technique for this purely by chance. Take Mulberry paper, stamp with VersaMark (or other embossing medium) pour on embossing powder (in this case Cosmic Shimmer gold) and heat. It melts beautifully into the paper so you get a faded jacquard fabric feel rather than something shiny. Note - the paper does shrink slighty.


My 'cream' centre is composed of an image posted by Linda a couple of weeks ago - I love it so much it had to be used again - and another of Astrid's vintage postcard images. Astrid has been playing along with Linda's challenge too, so take the chance to catch up on her gems. I loved Linda's poinsettia but have yet to acquire her wonderful crinoline, so a stamped/layered image was used instead.


And to top off this vintage tag some lace and ribbon. There. Done. It has been great playing along with Linda's challenge, pushing me in unexpected directions, and has seriously helped get the cards done this year. As well as entering Linda's 12 Tags of Christmas Challenge 12, it will also by entered for the latest Frilly and Funkie Challenge - Make It A Tag.
Now, before I go I want to share one last card - this one arrived in the post from my wonderful crafting friend Anne, and oh boy what a gem it is!


How cool is that. Thanks Anne. I'm still smiling from ear to ear:)
Time to go and get some sleep, but I just want to take another opportunity to say a huge thankyou to everyone who visits/leaves comments. You are all wonderful. Hugs, Jenny x

12 December 2012

It's the trepidation that stops you...

Wondering why that title? Sometimes the fear of getting something wrong can be paralysing, preventing you from just diving in with a project, and so it was with this card.


Some time ago, alright, ages ago my crafty friend Anne sent me four pieces of Specialty Paper with this Stampendous image stamped on them just because she'd seen me admiring it. How generous is she? Oh, you don't know the half of it (more tomorrow:) I didn't want to mess them up but didn't know how to approach them. Well time is now of the essence, so this weekend I bit the bullet and went for it.


Inspiration came courtesy of Sue the Iron and Jennifer Dove (thank you ladies, your work is amazing).
Three cards needed to result from this challenge so I had just one to 'play' with.


I inked it up with Distress Inks/Markers which were blended out with water, but there needed to be a definite contrast between the central panel and the outside (without the aid of a decoupage layer). Like the warm light coming from those little windows?


And so the first stamped image became a mask so the central panel could be clear embossed several times. The outer edges got distressed to create a vintage feel.


Having matted and layered the image I messed around with different embellishments but they all seemed to overcrowd the card, so an altered metal foil die cut coloured with alcohol inks became my version of a metal corner piece. And there we have it. Probably seems simple now they're done but they feel 'professional' irl and achieved the end result I wanted, so in my book that's a result (oh, and not one of them went wrong either, which is a minor miracle!)

Challenges being entered with this;

Hope it gives your 'little grey cells' a bit of a nudge, especially if like me your seasonal cardmaking is not yet complete. Thanks for dropping by. Your visits/comments are appreciated more than you know.
Crafty hugs, Jenny xx

WOYWW 184

Yes, I am still on the planet (though I'm sure it feels to everyone like we are all caught up in some sort of timewarp, as the days are melting away at a much faster speed than normal!!!) Promise I will catch up on as many of you as possible this evening (after work/a meeting/life stuff) and I will also post a new card to meet another challenge deadline.

Now, the purpose of this post is to catch up on workdesks of the World, so...


In case you are unfamiliar with What's On Your Workdesk Wednesday it's a chance to share desks (in various states of disarray!) and catch up with crafting friends all courtesy of Julia Dunnit of Stamping Ground fame (all the details here). So what you see here is an extension of my table (well it's the top of the dog's indoor 'home'!) as I've had to spread out my Christmas bits and pieces to get the final cards finished. There are all sorts of bits and pieces of ephemera 'abandoned' from other projects so I can mess around and get the little grey cells working. At the top is a pile of dies and alongside it a mini sewing machine that a very good crafting friend has lent me to try out before committing to getting one. Just got to work out how to use it later!! There's also a small pile of Christmas templates that came free with a papercrafting magazine years ago - I discovered it by chance after being forced to use cookie cutters and it has been invaluable. So there you have it; a space as muddled as my brain sometimes! Now, Julia likes us to keep it short and sweet, so I'll be off for now and will 'do the rounds' asap. Hugs to everyone, Jenny x

9 December 2012

Two Tags for December

Having scooted around blogs again tonight it seems everyone is struggling to get everything done at this time of year. For me having taken part in The Funkie Junkie 12 Tags of Christmas this year has been a lifesaver in terms of getting cards made this year. I only have a few left to do now (ones to go out by hand, so no postal deadline!) and there are so many challenges/so much inspiration that I can't fail to get them done. Part of that inspiration came from the Duke of Distress himself with Tim's December tags (thanks for doing two!!) Here's my take on them...


And they were a joy to make:)


The light today is diabolical so it's not easy to pick up on the background - splatterings of DI Stormy Sky and some CS Mist. There are also embossed snowflakes.


Some stamped tissue and grungeboard letters, coloured and sealed with Rock Candy Clear Crackle Paint on the bottom section.


I had to make my own layered snowman, drawn by me, coloured with Picket Fence, Stormy Sky, Fired Brick, Peeled Paint and Spiced Marmalade DI's. Mr Snowman was deliberately scrunched up and re-flattened to give extra texture. The die cut was chopped up a little to create a shiny snowflake.


The background to this one were simpler - splattered/smooshed DI Fired Brick and Spiced Marmalade with CS Mist again.


These Basic Grey papers were a great base for the poinsettia, made richer with Distress Ink and Embossing Powder. My imfamous CS PVA glue dots worked well in the centre.


Die cuts were used to finish off the tag again. Obviously I'll be entering these into Tim Holtz 12 Tags challenge for December, and I hope you've enjoyed seeing them. Good luck getting your list of jobs completed amongst the ususal day to day stuff - I look forward to seeing what you've all been up to.
Hugs, Jenny x

7 December 2012

Christmas Postcards

Hi there everyone and welcome to the weekend. Fairly quick post tonight as I've just spent 2+ hours catching up with posts (mental note to self - do NOT go missing for longer for 2 days unless it's a dire emergency!) Wow, there is some amazing and inspiring work out there - you guys are so talented. Talking of talented, can I please beg your indulgence for a moment and request that you take a peek at this AMAZING dollshouse/craftroom HERE. I am in awe of the time, patience and attention to detail that this must have taken (just look at the craft knife for example!!!) and all this from a relatively new crafter. HUGE applause Laura. Keep at it hun:)


Now I'm sneaking in with my entry for the latest Our Creative Corner challenge - vintage Santa Claus is Coming to Town. My starting point was the freebie image of Santa on an old postcard from the lovely Linda Coughlin HERE. It really reminded me of the Freebie images posted HERE by the wonderful Astrid (again, take a while to look at Astrid's stunning work if you haven't seen it before). Sure enough they came up a treat when distressed and inked.


The background fell into place - the Sizzix Postcard embossing folder and thick white card smeared with Versamagic/Versamark and Distress Inks.


Although there were touches of red on the postcards (a requirement of the challenge) it is a colour that pops so well against the background colours, so a touch of ribbon was needed. And on a vintage piece you NEED vintage lace courtesy of The Funkie Junkie Boutique (re-opening in the New Year for all your crafting needs) - it takes ink beautifully which in this case was Antique Linen of course.


Like the rosettes? Handmade! Get me! Oh the trials and tribulations of not having a BS/Vagabond and TH dies! But hey, I've got a room full of stash and fiddling with paper is a joy in itself, honestly. The whole lot was topped off with seam binding, ribbon and twine. So there you have it. Jenny does subtle!

This weekend brings so many chores, with the added bonus of decorating (I'm OCD about the tree but now use my taller sons to reach the top branches for me:) However, there are the remaining tags/cards to be made and some specialty paper to be inked (courtesy of Anita Houston's tutorial HERE). Hope whatever you are up to you get chance to escape to your inky area for at least a bit of it. Hugs, Jenny x

4 December 2012

Melting Away

Welcome everyone, and thank you to my newest followers for choosing to join me. It's still such a thrill seeing that number rise slowly but surely, and I'm hoping you get a little inspiration from what you see. First up a quick heads up. Look to the right of your screen and you will see a link to the latest Crafty Individuals Christmas blog candy. It's immense!! so get over there (when you've finished here of course!) and get your name on the list. And now for my latest creation...


Being a big fan of The Funkie Junkie (Linda Coughlin herself) and her wonderful boutique it was a no-brainer for me deciding to join in with her 12 Tags of Christmas challenge which is very generously sponsored by The Funkie Junkie Boutique. There's still time to join in by taking inspiration from Linda's tags and creating your own projects as the deadline is 17th December - for all the details go HERE. This offering is my version of Linda's tag No. 11.


So what did I use from Linda's tag... well the background is almost identical, with Antique Linen Distress Ink and Brushed Cordrouy Distress Stain used in a dip, spritz and flick stylee over TH flourish embossing (Sheena's WOW pearl blue powder which looks almost Mother of Pearl) and script stamping. I don't have a holly leaf die, but used a template to draw some onto white and homemade brown glitter cardstock. When cut they were layered over some lace - I tried to make a wreath and failed, twice. Who knows why! The berries are my fav Cosmic Shimmer glue coloured with a Promarker, and I took further inspiration from Linda by adding TH mini fasteners as extra metallic berries.


The focal point is where I strayed from the original. Did you know you don't need a meltpot to create a puddle of molten embossing powder and you can mix your powder colours? If you heat them in a mince pie tin (after washing of course:) you can then pour the resultant liquid onto your craft mat and push your stamp into it. A dust of mica pearl powders helps to emphasise the image once you release the stamp. It ends up looking something like an oversized wax seal, depending on the size of your stamp of course.


To finish it was just a case of adding diecut strips of Basic Grey card, some of the matching lace and a 'bronze' button (again from Linda's tag). For me this was a relatively neutral tag which made a change and worked with the kraft card base.

It feels good to get this far with the challenge - only one more to go - and even more satisfying to see a large pile of individual cards ready to go shortly. Phew, no mad rush for a change. And on that note a quick message to my fellow What's On Your Workdesk Wednesday playmates - unfortunately I'm gonna be MIA tomorrow for personal reasons, but rest assured I will try to visit you guys during the rest of the week as time allows. In the meantime (and for those in the UK, in your best Brucie voices) "keep crafting".
Hugs, Jenny xx
Related Posts Plugin for WordPress, Blogger...