6 August 2016

Tim Holtz Creative Chemistry 103 - Day One

Hi everyone and welcome! WOW has it been a busy week and I'm not done yet! This week has seen the launch of Creative Chemistry 103, a set of online tutorials (and so much more) from the 'Professor of Distress' Tim Holtz who shares information and knowledge about his media lines, tips and techniques for using them and lots of inspiration from lots of top designers. If you haven't had time to join in the fun yet don't worry, the class remains 'live' through August 12th and remains open, well, for a lifetime!

I've been sharing my makes along the way on Instagram but wanted to show them in full here as a record of the journey of discovery I've been on this week. With five full days to share I'm splitting them up across five posts, so here goes with the results from Day One...

Distress Ombre


Distress Highlight


Distress Off-Set


Distress Washed Watercolour


Distress Micro Glaze


If you are sensing a birthday theme then yes, I'm also taking the opportunity to test out these techniques and build up my rapidly depleting stock of celebratory cards - (large family, two birds, one stone!!!)

OK, I'm actually playing catch up with the lessons myself so it's back to the classroom for me. See you there!!! Take care of yourselves, Jenny xxx

5 August 2016

Stencil It for A Vintage Journey

Hi everyone and welcome! Today sees the launch of the latest challenge at A Vintage Journey called 'Stencil It'. Our host for this one is the amazing Amanda and here's what she has in store for us; "There are so many fantastic stencils available to us right now and so many ways in which to use them so we would like you to include stencilling in whatever it is you choose to create for this challenge. Don’t forget all the ways in which they can be used – inks , sprays , paints, texture/embossing pastes and gesso are all stencil friendly. So be sure to have fun and embrace your stencils in your vintage; shabby; mixed-media; art journaling; industrial or steampunk projects.!"

This month we are being sponsored by Country View Crafts who are offering a shop voucher for a randomly drawn winner. And three hand picked Pinworthies will be offered a Guest appearance for later challenge, so there's plenty of reasons to join in the fun.

I actually had something of a plan in my head for this canvas, wanting to show how stencils can be used in layers with a variety of textures to create the perfect basis for the addition of a little colour and a scattering of embellishments.


And here's a guide to show you how that background came together;

Check out How to Create a Layered Stencil Background by Jenny Marples on Snapguide.

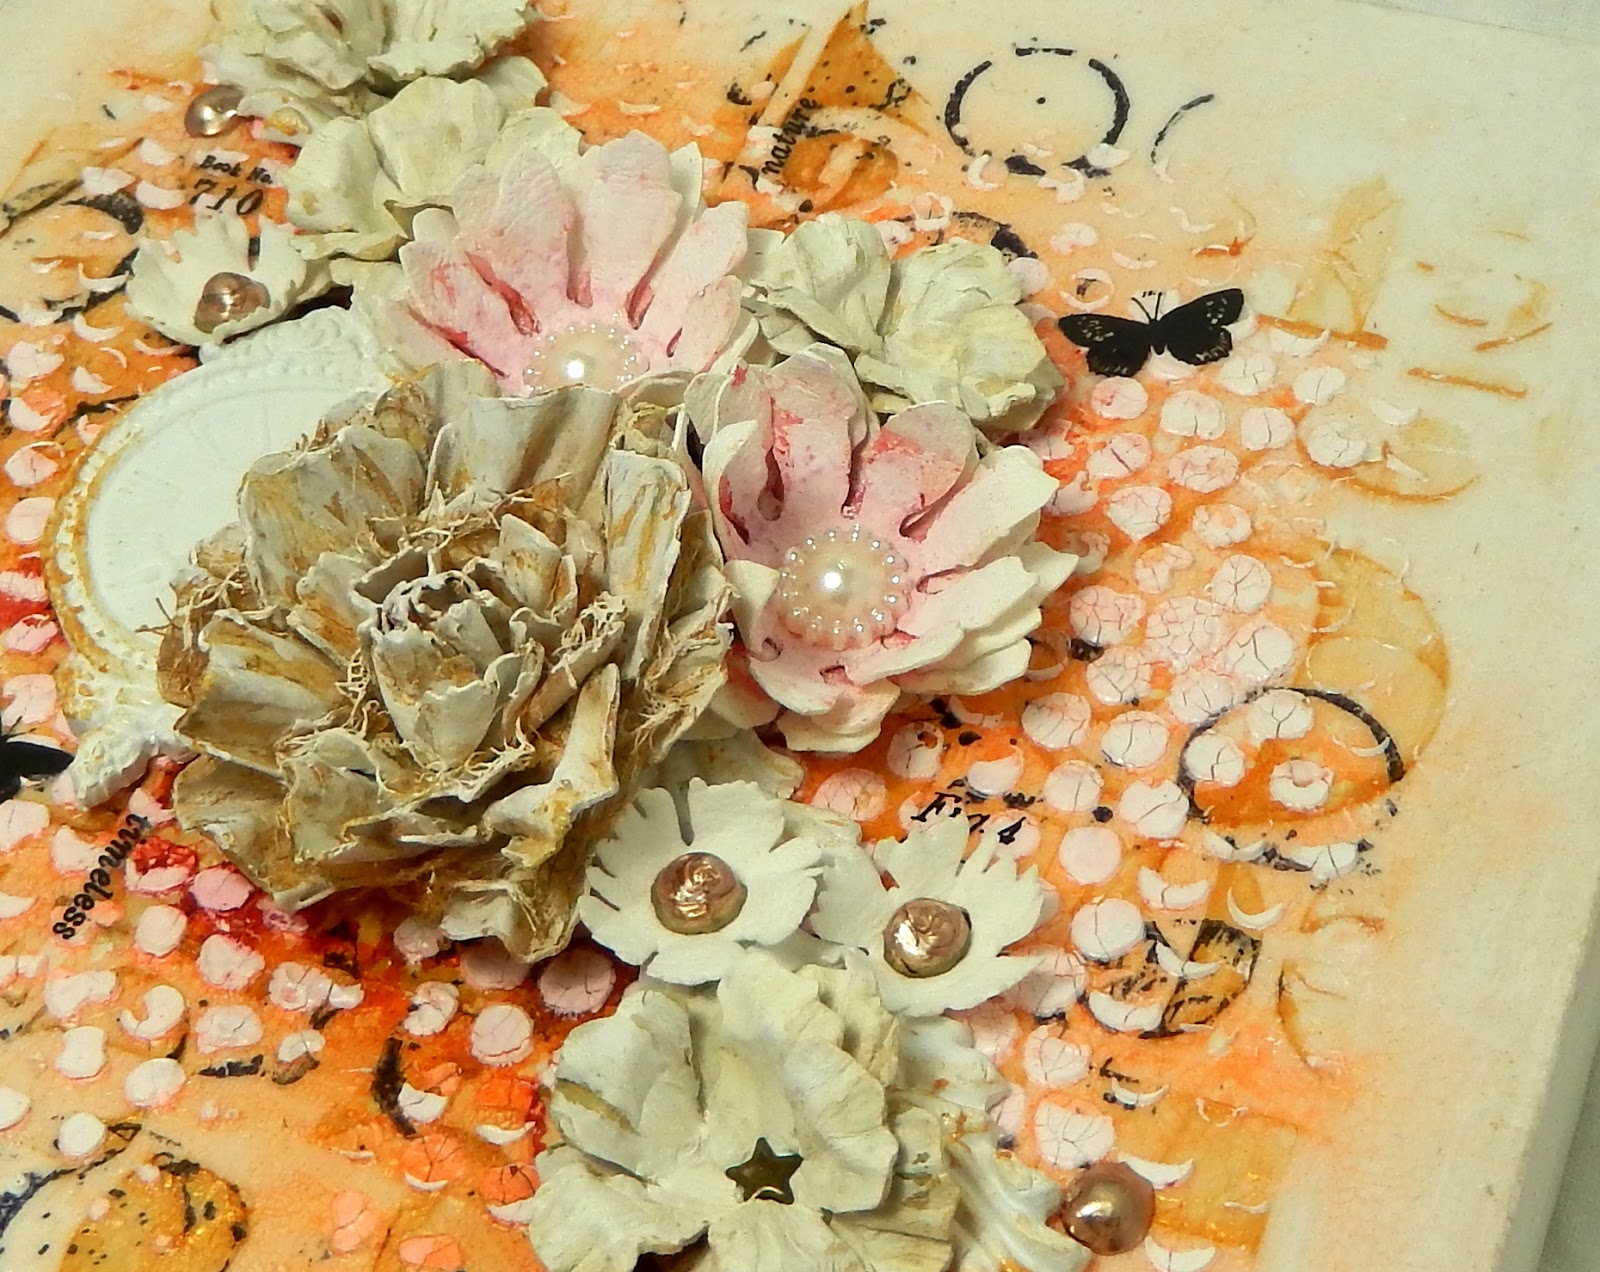
Finally here are some close up photos which let you can see how the handmade flowers and plaster moulds work to enhance that background and provide the essential focal point. I deliberately kept the colours pale and added plenty of layers of white gesso to emulate those gorgeous plaster mouldings you see on the finest buildings in Britain. And did you know you can use the thinnest of smears of gold embossing paste as a way of highlighting moulds and flowers!


I love how the alcohol inks really help to reveal the crackle texture and lower layers of stencilling/crazing. Tim Holtz Remnant Rubs are a great way of adding a little extra detail over uneven surfaces. Coat them with a little matte medium to ensure they remain securely in place. Some of the flowers have been created using Substrate Sheets and there's a guide to making the largest of the flowers on my Snapguide page if you're curious.


I am entering this into the following challenges;

So that's where this month's fabulous theme took me. Now I urge you to hop on over to A Vintage Journey to see what my fellow Creative Guides have come up with - it's well worth the trip! Then it's over to you - the challenge will remain open for a month so there's plenty of time to get those creative juices flowing and link up your entries to be in with a chance to win. For now take care of yourselves, Jenny xxx

3 August 2016

By The Sea at Frilly and Funkie

Hi everyone and welcome! It's Kathy's turn to host the current Frilly and Funkie challenge 'By The Sea', and today it's the turn of the Funkie side of the team to share their projects. Here's what Kathy has to say about her choice of theme; "It's summertime, and our minds turn toward the shore where we find sparkling sands, delicate shells and refreshing breezes. Let's take a virtual beach trip by creating any kind of vintage or shabby chic project that features a nautical or beach theme and colour palette."

The winner will earn the chance of a Guest DT spot at Frilly and Funkie, and everyone who enters and follows the rules will go into the draw for the chance to win a $25 spending spree at The Funkie Junkie Boutique. And there are Top 3 Badges for three further outstanding entries. The challenge closes on August 9th so there's still plenty of time to get those projects linked.


This was definitely one of those occasions where the crafting gods aligned perfectly - I actually created this nautical canvas specifically for my craftie bestie Anne's birthday as I know how much she loves this theme. Kindly, Anne was happy for me to share it with you as part of the current Frilly and Funkie challenge (thank you so much for allowing me to do that sweetie!)

The background was one of those that looked awful initially but improved immeasurably every time another layer of Distress Paint was applied. You've got Broken China at the bottom, with some Seth Apter Impression Obsession 'Pattern Play' stamping added. Then I mixed Rust and Mountain Rose Alcohol Inks into some course paste to give it that beautiful salmon colour and spread it across the canvas in random swipes. After that came lots of dry brushing with the remaining Distress Paints listed below (all except Barn Door that is) to reach the point where it looked complete.


Then came the fun of layering up those seaside elements - the die cut greenery was coloured with the same paints used in the background and you'll spot seashells, twine, gauze and various 'rusty' elements underneath the stamped seahorse. That's where the Barn Door came in - combining it with black gesso, Vintage Photo and Rusty Hinge paints and a coat of Rust Alcohol Ink made sure a filigree metal disc and Seth Apter SpellBinders 'Robo Ring' coordinated perfectly with a couple of naturally rusted discs. Underneath it all I stencilled some Texture Paste through the Bubble stencil and sprinkled Tumbled Glass Distress Glitter over it for an added touch of glamour.


I'm entering this into the following challenges;

Regardless of the weather outside it's always wonderful to recall memories of enjoyable times spent at the beach. How will you be inspired by yours? We'd love to see them over at Frilly and Funkie. To give you even more inspiration be sure you hop on over to see the fantastic creations from the rest of the Design Team, including the latest ones from the Funkie side.

Thank you for joining me today. Whatever you're up to for the rest of the week take care of yourselves, Jenny xxx


30 July 2016

Loving Luscious

Hi everyone and welcome! It's been a busy week here, with the IndigoBlu team working hard behind the scenes to create samples for Kay Halliwell-Sutton's shows this weekend on Hochanda. And we've had a new toy to play called Luscious... you're gonna have to tune in to see Kay in action on Saturday and Sunday to find out more about it - I'm not spoiling the surprise! What I will share here are the samples I made...


Isn't that shimmer divine! And Lucious is so versatile - I've only scratched the surface with the possibilities... more time required in the craft room methinks - oh life's so hard!!! (not). Make sure you tune in to see Kay's shows so you don't miss out on the fun too.

Whilst it was a busy week, I got the chance for some 'time out' on Wednesday for a very special 'meet up'. I'll share more about it soon together with some beautiful gifts from a very special lady. Until then take care of yourselves. Jenny xxx

22 July 2016

IndigoBlu Resident Guest Designer

Hi everyone and welcome back to my second post of the day (the first can be seen HERE). I'm so excited to finally be able to announce my new role as an IndigoBlu Resident Guest Designer over on the IndigoBlu blog today.


I hope you can join me over there to see what's in store for the year ahead.
In the meantime have a great weekend and whatever you're up to take care of yourselves. Jenny xxx

Friday Focus at Frilly and Funkie - Wendy Vecchi Stamps

Hi everyone and welcome. It's my turn to host the latest edition of Friday Focus over at Frilly and Funkie today - I've been having fun with Wendy Vecchi stamps and stencils this time. Here's a sneak peek of the finished canvas...


To see the whole project and find the link to an extra discount on Wendy Vecchi stamps I'd love you to head over there and join me.

I'll be back in a few hours with some exciting news and hope you can join me for that too.

Whatever you're up to this weekend have a great one and take care of yourselves, Jenny xxx

20 July 2016

All Lined Up at Frilly and Funkie

Hi everyone and welcome. It's my turn to host the current Frilly and Funkie challenge 'All Lined Up', and today it's the turn of the Funkie side of the team to share their projects. For this one we need you need to think in straight lines! Be it rows or columns, stripes or even grids make sure those vertical and/or horizontal lines or rows of things are a clearly visible part of your vintage or shabby chic projects (the edges don't count!)

The winner will earn the chance of a Guest DT spot at Frilly and Funkie, and everyone who enters and follows the rules will go into the draw for the chance to win a $25 spending spree at The Funkie Junkie Boutique. And there are Top 3 Badges for three further outstanding entries. The challenge closes on July 26th so there's still plenty of time to get those projects linked.


This canvas is one of those that was in my head in almost complete form, a rarity I have to say! so getting the chance to create it and use my brand new Seth Apter stamps and dies was exciting. For those of us who were desperate to get our paws on them, Linda did a special order; if you're interested in these or any other products, you can contact her at customerservice@thefunkiejunkie.com. For this canvas I used the Spellbinders 'Robo Square' die set, and the Impression Obsession 'Pattern Play' and 'Solar System' stamp sets. There are gridlines faintly visible beneath the layers of paint and paste, and lines and circles stamped onto and underneath the row of ink stained squares. I'm particularly in love with the largest Robo Square that was given a faux rust look with gesso, paints and ink. Bronze pieces and jewelled flowers surrounded some real rusted nails straight from my old decking (a piece is still attached to one of them!)


The background consists of layer upon layer of different pale colours over a textured base with a final swipe of white gesso and some Latte Alcohol Ink to add the aged areas. The stamping on this base was done with paint as I've found after many failed attempts with inks that paints are much better at leaving an impression on a painted textured background. To ensure the nails are secure I tied twine around and through the squares before mounting them on the canvas with the other embellishments.


I love adding lines and rows to my projects as they help build and ground the design. Do you do this? Have you created a project which uses lines in some way? We'd love to see them over at Frilly and Funkie. To give you even more inspiration be sure you hop on over to see the fantastic creations from the rest of the Design Team, including the latest ones from the Funkie side.

Thank you for joining me today. I'll be back on Friday with the latest Friday Focus post. For now I'd like to wish my bestie Anne Redfern a very Happy Birthday and am off to do some celebrating of my own. Whatever you're up to for the rest of the week take care of yourselves, Jenny xxx


Related Posts Plugin for WordPress, Blogger...