30 September 2015

Chalk It Up! at Frilly and Funkie

Hi everyone and welcome. It's Week Two of the latest Frilly and Funkie challenge 'Chalk It Up!' and our host, Shelly, says "I thought it would be fun to experiment with chalk techniques - whether it's stamping with chalk inks, using a faux chalkboard technique, coloring with chalks, or even dabbling in your art journal with sticks of chalk - we want to see what you can create using chalk as a theme!" With the chance of a Guest DT spot at Frilly and Funkie, three Top 3 badges, and a draw for a $25 spending spree at The Funkie Junkie Boutique, there are plenty of reasons to join in the fun.

It's a rare joy when a fully formed idea pops into my head (and incredibly helpful when you are more than a little busy!) Thankfully it happened for me this time. Having already swiped black embossing paste and black gesso roughly over a small canvas, I had the perfect uneven base on which to create a rustic chalkboard piece (with more than a hint of French country charm)...


For that chalkboard feel I reached for my Snow Cap pigment ink (alternative listed below) and used it with Wendy Vecchi's Vintage Mesh background stamp for the middle portion of the canvas. To top and tail it properly the ornate border from her Art and You set worked perfectly and they were finished with an Industrial border strip. Having rubbed plain white chalk along the edges of the canvas I attached some thin Venise lace on top.


The centre was created using an idea from Wendy's fabulous August 2015 London course with her faux enamelled technique used on the little cup and saucer. That gave me yet another opportunity to use the pigment ink for the splatters on that gorgeous Sky Blue embossed base. I love the Hydrangea SiSi set and used it in combination with Newsprint paper and Blackout Clearly for Art to add dimension and rigidity. The colours used included Leaf Green, Fern Green, Potting Soil, Peony Pink, Violet and of course Hydrangea! Little dots of Pewter Liquid Pearls added a little finesse to the blooms and my favourite Small Talk Chit Chat Stickers and Remnant Rubs provided just the right words again.


I am so pleased that Shelly suggested this theme as it was such fun to work to and helped to create a piece which should by now be sat in its new home. Isn't it wonderful when your most favourite projects are the ones you end up giving as gifts to special friends.

That's it from me for now. I look forward to see how you choose to 'Chalk It Up!' for the challenge over at Frilly and Funkie, and for lots more incredible inspiration please make sure you check out the projects created by my uber-talented Funkie team mates, including our latest addition Zoe!

Whatever you're up to take care of yourselves, Jenny xxx


Tim Holtz September Tag... Just!

Hi everyone and welcome to my second post of the day. It wasn't my plan to post twice but this is the last day of the month and it's been another ridiculously busy month. And so my September Tim Holtz 12 Tags of 2015 project has come on the last day again. Not sure the photo on this does it justice but it was the only angle I could get the shine coming through. As ever Tim makes it all look supremely easy - I may have to keep practising!


For my version I combined Butterscotch, Rust and Denim Alcohol Inks with Gold Mixative on the central piece of card, then stamped Ledger Script onto the background, masking off an area for the little camera. However, when I added the transparent paste through the Tiles stencil and rubbed over the Black Archival Ink it started to get lost. So I added the other elements, coloured a piece of card with Faded Jeans and Spiced Marmalade and used it as a second base for my Frosted camera. The background is a mix of Faded Jeans and Rusty Hinge Stain Sprays with a generous splattering of the Tarnished Brass, Hickory Smoke and Picket Fence flavours.

Phew! That's it for September! Bring on October... Thanks so much for stopping by. Jenny xxx

16 September 2015

Stamps Be Gone! at Frilly and Funkie

Hi everyone and welcome. It's the second week of the current challenge over at Frilly and Funkie and this time our fabulous host Pamellia has chosen a great theme, 'Stamps Be Gone'. How would you decorate your project if you didn't own any stamps? Embossing folders, stencils, or perhaps a little hand doodling? Well, let's put it to the test for this challenge. Other than a small sentiment you need to use no stamps at all on your vintage or shabby chic creations.

And why enter? The Design Team will choose their top four picks with the winner being invited to join us in a Guest DT spot at Frilly and Funkie and the next three will receive badges to display on their blogs. Everyone who enters and follows the rules will be entered into the draw to have the chance to win a $25 spending spree at The Funkie Junkie Boutique.


At this point you're probably wondering if I've lost the plot! If you haven't seen my Facebook page recently, you'll not know that a long held dream of mine came true at the beginning of September when my darling hubby booked a romantic trip for two to Venice (to celebrate our Silver Wedding Anniversary)... oh be still my beating heart! Visiting Venice has been on my 'bucket list' for ever and it COMPLETELY lived up to all expectations. I have so many wonderful memories and took hundreds of photos, and my 'Stamps Be Gone' project focuses on one of these...

(click on each image for a closer look)

Wherever you look in Venice there's another gorgeous view featuring it's famous canals and colourful crumbling architecture. Renovation is an ongoing battle when you are surrounded by the sea but, like a fine wine, they seem to have improved with age and even dilapidation looks fabulous! I took this photo along one of the many tiny side 'streets' enchanted by the ornate archway and exposed brickwork. Warm colours and wisteria blended beautifully and I wanted to capture all of this on a canvas, keeping the photo as the focal point.


I adhered paper from Tim Holtz's Wallflower Paper Stash to a blank canvas with Glue n Seal, sanding the edges for a worn look. Mixing Frayed Burlap Distress Paint to texture paste I scraped on an uneven layer of 'plaster', then added Fired Brick, Fossilized Amber and Hickory Smoke flavours to what was left and spread it through the Wendy Vecchi Basically Bricks stencil. A quick spritz of Pumice Stone and Frayed Burlap Distress Stain Sprays added extra mottling.


To echo the photo I added a similar die cut pediment and kraft core window directly onto the canvas. I'd already layered the photo onto similar sized pieces of Tim Holtz Menagerie Paper Stash, sanding back all the edges and adding some spare mountboard to ensure it 'floated' above the surface of the canvas. It allowed for the trailing leaves to be inserted underneath and in-between those layers to echo the foliage in the photo. Having used various shades of green Distress inks on manilla card these were die cut with the Garden Greens and Fall Foliage and layered with brass leaves and Heirloom Roses. I finished as usual with some splattering - Hickory Smoke and Antique Linen Distress Paints with Lindy's Stamp Gang Golden Doubloons Moon Shadow Mist (an essential these days!)


It has to be said I did miss using my stamps but as Pamellia said, there are plenty of other ways to add interest and detail to your projects. I can't wait to see what you come up with! Now, for some more inspiration a trip to the Frilly and Funkie challenge blog is essential where my Funkie team mates have some stunning projects to share with you.

Whatever you're up to this Wednesday take care of yourselves. Jenny xxx


11 September 2015

Iris Canvas at IndigoBlu

Hi everyone and welcome. It's my turn to share a brand new project using some of the new 'Floral Vignettes' Mixed Media Papers over at the IndigoBlu blog today. Here's a sneak peek to whet your appetite...


And if you'd like to see more of what can be done with these wonderful designs the Design Team are focussing on them this month so remember to take a look at the other posts too.

And as the weekend approaches I'm gearing up for a demonstration day down at Poppycraft in Wallingford, Oxfordshire. It's one of my favourite craft shops ever, crammed from floor to ceiling with everything you could possibly need (like the craft room you've always wanted!) so I'm really excited to be going back and would love you to join me if you are in the area.

Whatever you're up to this weekend take care of yourselves. Jenny xxx

4 September 2015

Friday Focus at Frilly and Funkie

Hi everyone and welcome back to my second post of the day (you can find the first one HERE). This one's a quick heads up to let you know its my turn to host the Friday Focus slot over at Frilly and Funkie today.


With the focus on all things IndigoBlu, I'm back as promised with a step by step tutorial for the gilded card I shared in my post on Wednesday.
Hope you can join me over at Frilly and Funkie!

Take care of yourselves, Jenny xxx

Home Sweet Home for A Vintage Journey

Hi everyone and welcome. Today sees the launch of the latest challenge over at A Vintage Journey. Our host for this month is Jennie and she's picked the theme 'Home Sweet Home'. Here's what she has to say about it; "For most of us the summer holidays are over, schools are back and it is nice to be home and back in the usual routines. So for this challenge let's create a project which sums up "home" for each of us (either past or present), using Tim's fabulous array of products and techniques. Just make sure Tim's style is evident in what you make."

(click on each image for a closer look)

It was one of those rare occasions when I knew exactly how I wanted to tackle the theme, adding a heart to the centre of a 3D house, as for me 'home is where the heart is'. Then when the pages of my 'Compendium of Curiosities 3' fell open at the page showing Tim's Altered Burlap tutorial it seemed as if fate had intervened to show how to cover my little house. And as it progressed further many more of Tim's ideas came into play too.

I'll move on to the outside later; for now let's look inside this little home. As I planned to apply the Postale Tissue Wrap once the house had been constructed covering the inside with it would have been tricky but for the fact that Tim has shown previously how to wrinkle it for added texture. With a blend of Tumbled Glass and Frayed Burlap Distress Paints over the top it soon transformed into a 'grotto'.


I have a lovely crafty friend who, along with her husband, is taking a leap of faith and following a dream to relocate to the coast. They were both increasingly in my thoughts as this project developed and it occurred to me that we can survive without so many of our material possessions as long as we have special people to share our lives with. In one way that explains the saying 'home is where the heart is'.

With all this in mind I cut the loving couple from a Found Relatives card, added the Chit Chat stickers and covered it all in Glue n Seal to give a matt finish, mounting them inside the house. To emulate a coastal grotto I added small shells and created Tiny Tattered Florals with sanded kraft core cardstock. The heart was easy and effective; die cutting small heart shapes from acetate packaging I glued these together with Glossy Accents (sandwiching a piece of Idea-Ology Jute String between those layers from which to hang the finished heart). Once dry I followed Tim's Faux Cracked Glass tutorial to add texture and colour, finishing this centrepiece with a Heart Charm and suspending it through the chimney.


As mentioned previously I followed Tim's Altered Burlap tutorial for the outside of the house adding the burlap to the card before die cutting the box shapes which were used in the initial construction. The same Tumbled Glass and Frayed Burlap Distress Paints were daubed over coordinating Ephemera, used in this case to represent the everyday working life that my friend is leaving behind. Keeping the finishing touches (Industrious Borders, Small Talk stickers and Remnant Rubs) flat seemed essential in this case as I don't want to add too much complication to their packing!!! It also made the house even more tactile. Here it is shown from the other angles...


Now you've seen my 'Home Sweet Home' it's time to hop on over to A Vintage Journey where my fellow Creative Guides are sharing their own amazing projects. Then it's over to you - the challenge will remain open for a month so there's plenty of time to get those creative juices flowing and link up your entries to be in with a chance to win!

I'm back later this morning with a Friday Focus for Frilly and Funkie and hope you can join me for that.
For now though, take care of yourselves, Jenny xxx


Distress Paints, Inks, and essentials, Idea-Ology, Sizzix Dies and Tim Holtz Stamps can all be purchased at Country View Crafts.

2 September 2015

Touch of Gold at Frilly and Funkie

Hi everyone and welcome. It's the second week of the current challenge over at Frilly and Funkie and this time our host, the lovely Georgie, has chosen a truly bling theme, 'A Touch of Gold'. Here's what she had to say about it; "Metal elements, glitter, embossing powder, paint, ribbon, whatever it is lets see a splash of gold in your vintage or shabby chic projects!!"

And why enter? The Design Team will choose their top four picks with the winner being invited to join us in a Guest DT spot at Frilly and Funkie and the next three will receive badges to display on their blogs. Everyone who enters and follows the rules will be entered into the draw to have the chance to win a $25 spending spree at The Funkie Junkie Boutique!

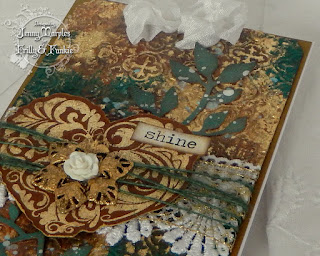
My post today is going to be brief as I'll be sharing a full tutorial for it on Friday for the Frilly and Funkie Friday Focus. Here's my tag card (with a little more than a touch of gold I must confess!)

(click on the image for a closer look)

I had fun experimenting with gilding, paints and inks to create an aged tiled background for this card and look forward to sharing my ideas with you.
For now make sure you head over to Frilly and Funkie to see what my Funkie team mates have created (amazing projects again!!!).

Take care of yourselves, Jenny xxx

Related Posts Plugin for WordPress, Blogger...